Anew on-device embedding-based search library has been announced that lets people find similar images, text, or audio in just a few milliseconds from millions of data samples.
It works by putting the search query into a high-dimensional vector that semantically shows what the query means. Then, it uses a program called ScaNN (Scalable Nearest Neighbors) to look for similar items in a database that has already been set up. To use it with a dataset, one needs to build a custom TFLite Searcher model with the Model Maker Searcher API (tutorial) and then send it to devices with the Task Library Searcher API (vision/text).
If I don’t have a need to define custom layers, is it still a common practice to use tensorflow (2.0) without the keras API, or is everyone just using keras now? Is there a scenario that makes sense to just use TF without keras if I’m not defining custom layers or anything.
EDIT: I don’t even see any tutorials on tensorflow.org docs that use defining custom layers without keras. Is it even possible to build a simple model with TF 2.0 without using keras?
Hey, I have trained an image classification problem to classify plant diseases, the training went well when testing the model with evaluate it gives 90% accuracy, it’s all rainbows, and till I started predicting single image.
I have 38 classes problem is if I tested it on an image from class 1 it will predict the image is class 10,
test it on an image from class 2 it will predict the image is class 11, class 3 will be class 12 class 4 will be class 13 and so on, like the labels are shifted linearly.
most images from any class will have their labels shifted to another class. I don’t know what’s going on here, any help would be appreciated.
code for reading the image and loading it to the model
And no, this is not my code, but grapped from a github repository. It’s a prove of concept, to see if i can do, what i want it to do. I’ll rewrite it, if i decide to go forward with Keras
Posted by Aurelien Boffy, Senior Staff Software Engineer, and Roberto Pieraccini, Engineering Director, Google Assistant
When people converse with one another, context and references play a critical role in driving their conversation more efficiently. For instance, if one asks the question “Who wrote Romeo and Juliet?” and, after receiving an answer, asks “Where was he born?”, it is clear that ‘he’ is referring to William Shakespeare without the need to explicitly mention him. Or if someone mentions “python” in a sentence, one can use the context from the conversation to determine whether they are referring to a type of snake or a computer language. If a virtual assistant cannot robustly handle context and references, users would be required to adapt to the limitation of the technology by repeating previously shared contextual information in their follow-up queries to ensure that the assistant understands their requests and can provide relevant answers.
In this post, we present a technology currently deployed on Google Assistant that allows users to speak in a natural manner when referencing context that was defined in previous queries and answers. The technology, based on the latest machine learning (ML) advances, rephrases a user’s follow-up query to explicitly mention the missing contextual information, thus enabling it to be answered as a stand-alone query. While Assistant considers many types of context for interpreting the user input, in this post we are focusing on short-term conversation history.
Context Handling by Rephrasing One of the approaches taken by Assistant to understand contextual queries is to detect if an input utterance is referring to previous context and then rephrase it internally to explicitly include the missing information. Following on from the previous example in which the user asked who wrote Romeo and Juliet, one may ask follow-up questions like “When?”. Assistant recognizes that this question is referring to both the subject (Romeo and Juliet) and answer from the previous query (William Shakespeare) and can rephrase “When?” to “When did William Shakespeare write Romeo and Juliet?”
While there are other ways to handle context, for instance, by applying rules directly to symbolic representations of the meaning of queries, like intents and arguments, the advantage of the rephrasing approach is that it operates horizontally at the string level across any query answering, parsing, or action fulfillment module.
Conversation on a smart display device, where Assistant understands multiple contextual follow-up queries, allowing the user to have a more natural conversation. The phrases appearing at the bottom of the display are suggestions for follow-up questions that the user can select. However, the user can still ask different questions.
A Wide Variety of Contextual Queries The natural language processing field, traditionally, has not put much emphasis on a general approach to context, focusing on the understanding of stand-alone queries that are fully specified. Accurately incorporating context is a challenging problem, especially when considering the large variety of contextual query types. The table below contains example conversations that illustrate query variability and some of the many contextual challenges that Assistant’s rephrasing method can resolve (e.g., differentiating between referential and non-referential cases or identifying what context a query is referencing). We demonstrate how Assistant is now able to rephrase follow-up queries, adding contextual information before providing an answer.
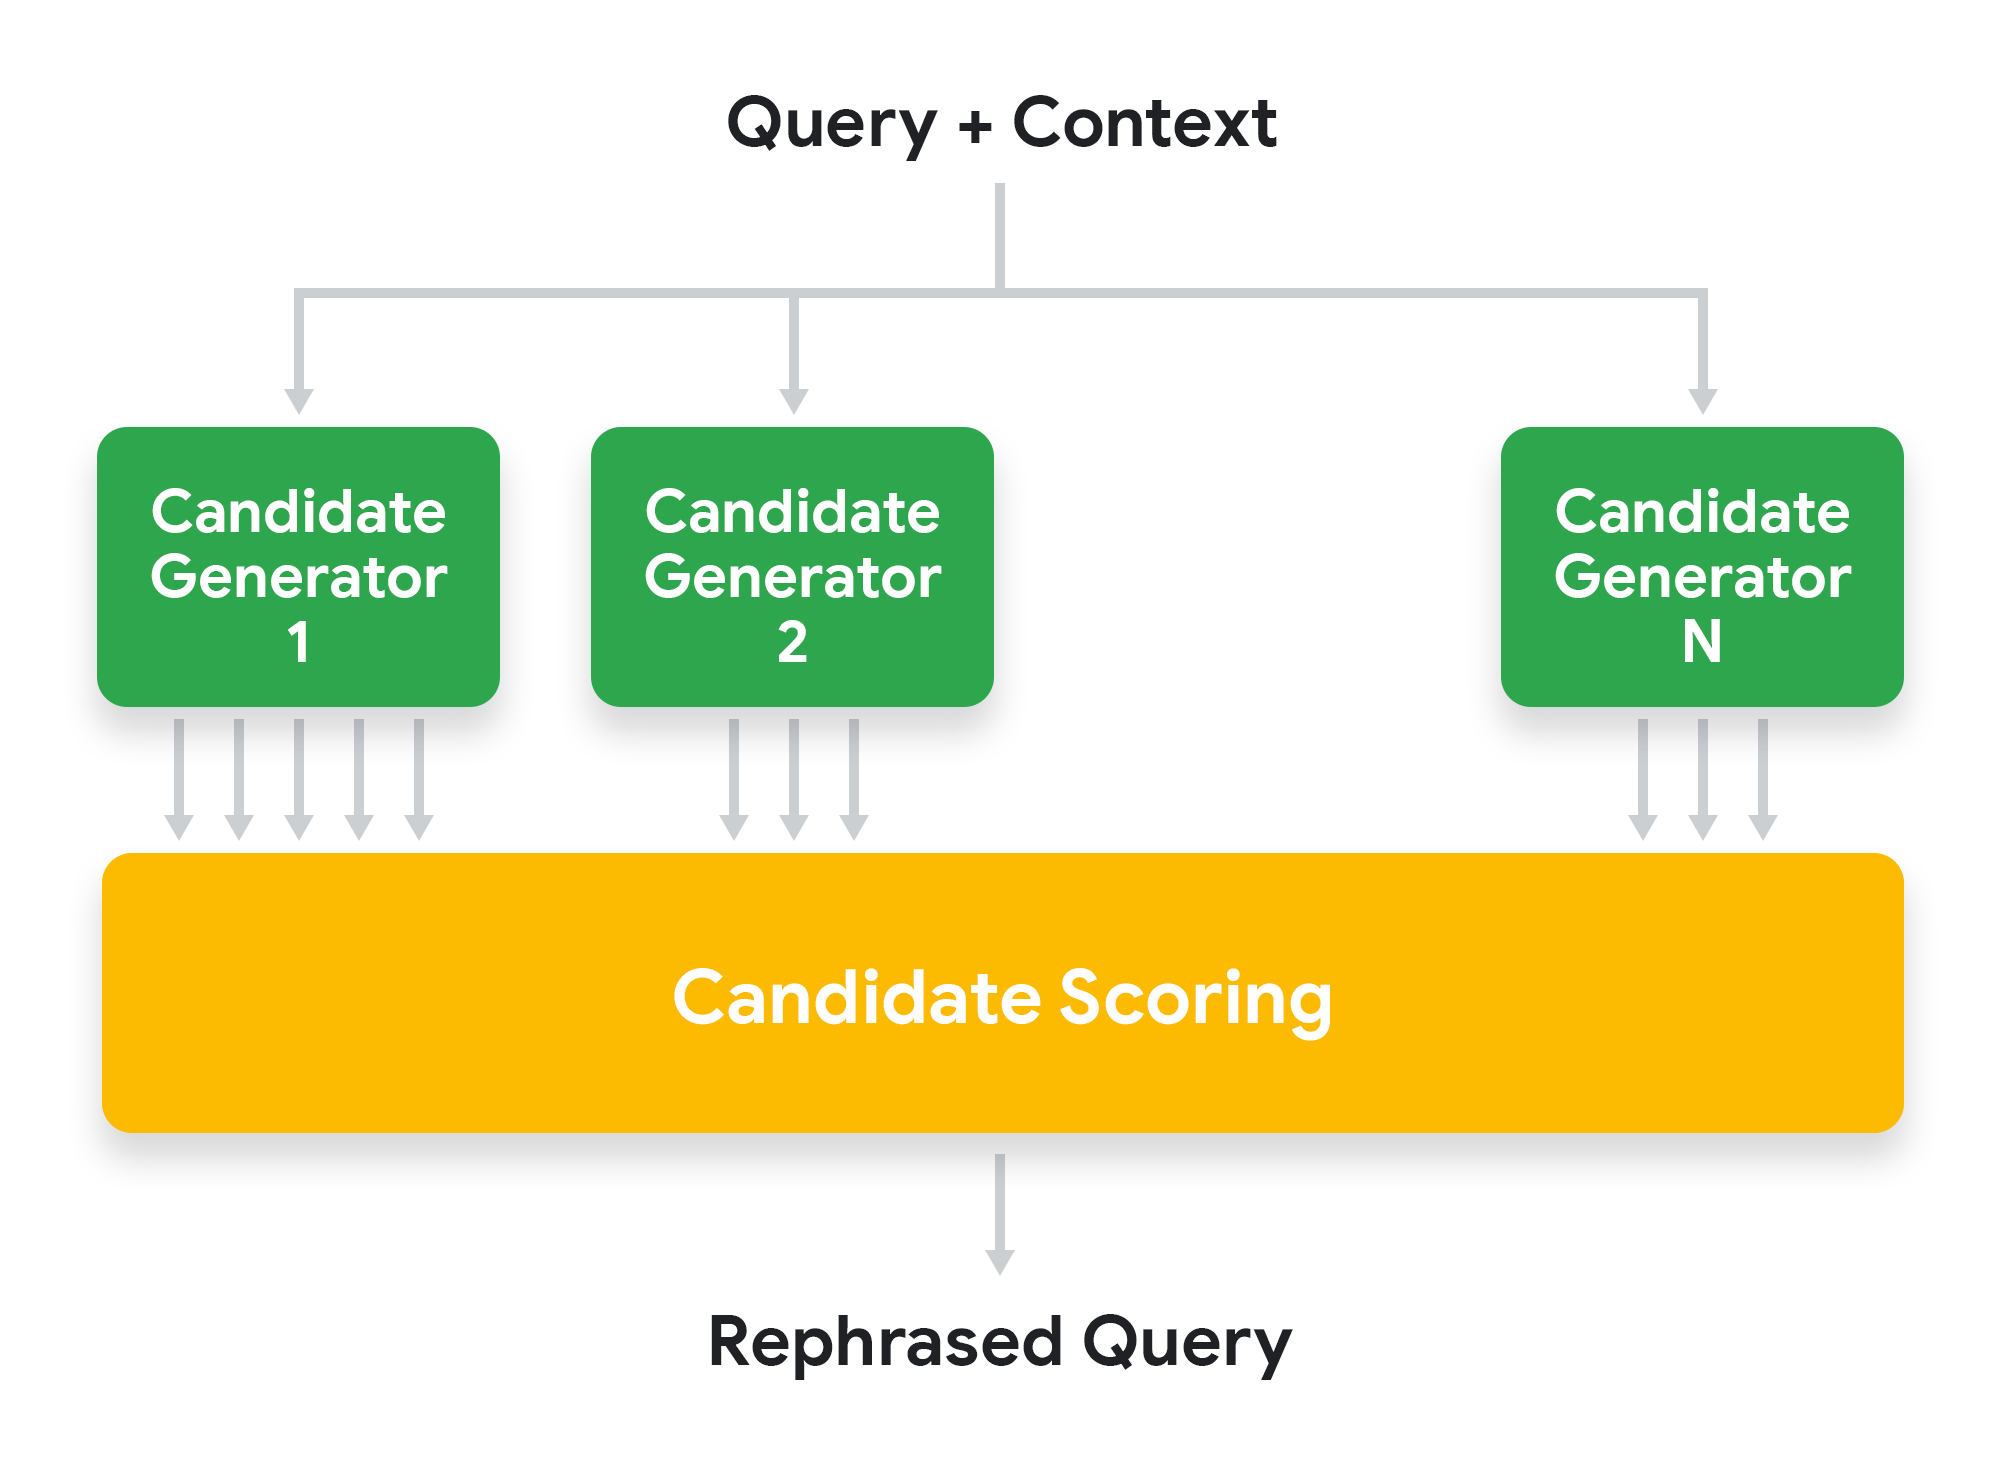
System Architecture At a high level, the rephrasing system generates rephrasing candidates by using different types of candidate generators. Each rephrasing candidate is then scored based on a number of signals, and the one with the highest score is selected.
High level architecture of Google Assistant contextual rephraser.
Candidate Generation To generate rephrasing candidates we use a hybrid approach that applies different techniques, which we classify into three categories:
Generators based on the analysis of the linguistic structure of the queries use grammatical and morphological rules to perform specific operations — for instance, the replacement of pronouns or other types of referential phrases with antecedents from the context.
Generators based on query statistics combine key terms from the current query and its context to create candidates that match popular queries from historical data or common query patterns.
Generators based on Transformertechnologies, such as MUM, learn to generate sequences of words according to a number of training samples. LaserTagger and FELIX are technologies suitable for tasks with high overlap between the input and output texts, are very fast at inference time, and are not vulnerable to hallucination (i.e., generating text that is not related to the input texts). Once presented with a query and its context, they can generate a sequence of text edits to transform the input queries into a rephrasing candidate by indicating which portions of the context should be preserved and which words should be modified.
Candidate Scoring We extract a number of signals for each rephrasing candidate and use an ML model to select the most promising candidate. Some of the signals depend only on the current query and its context. For example, is the topic of the current query similar to the topic of the previous query? Or, is the current query a good stand-alone query or does it look incomplete? Other signals depend on the candidate itself: How much of the information of the context does the candidate preserve? Is the candidate well-formed from a linguistic point of view? Etc.
Recently, new signals generated by BERT and MUM models have significantly improved the performance of the ranker, fixing about one-third of the recall headroom while minimizing false positives on query sequences that are not contextual (and therefore do not require a rephrasing).
Example conversation on a phone where Assistant understands a sequence of contextual queries.
Conclusion The solution described here attempts to resolve contextual queries by rephrasing them in order to make them fully answerable in a stand-alone manner, i.e., without having to relate to other information during the fulfillment phase. The benefit of this approach is that it is agnostic to the mechanisms that would fulfill the query, thus making it usable as a horizontal layer to be deployed before any further processing.
Given the variety of contexts naturally used in human languages, we adopted a hybrid approach that combines linguistic rules, large amounts of historic data through logs, and ML models based on state-of-the-art Transformer approaches. By generating a number of rephrasing candidates for each query and its context, and then scoring and ranking them using a variety of signals, Assistant can rephrase and thus correctly interpret most contextual queries. As Assistant can handle most types of linguistic references, we are empowering users to have more natural conversations. To make such multi-turn conversations even less cumbersome, Assistant users can turn on Continued Conversation mode to enable asking follow-up queries without the need to repeat “Hey Google” between each query. We are also using this technology in other virtual assistant settings, for instance, interpreting context from something shown on a screen or playing on a speaker.
Acknowledgements This post reflects the combined work of Aliaksei Severyn, André Farias, Cheng-Chun Lee, Florian Thöle, Gabriel Carvajal, Gyorgy Gyepesi, Julien Cretin, Liana Marinescu, Martin Bölle, Patrick Siegler, Sebastian Krause, Victor Ähdel, Victoria Fossum, Vincent Zhao. We also thank Amar Subramanya, Dave Orr, Yury Pinsky for helpful discussions and support.
Doing zero trust well requires enterprises to monitor and analyze massive amounts of data, supported by artificial intelligence and accelerated computing.
As digital enterprise trends like remote and hybrid work, bring-your-own-device (BYOD), and cloud-based infrastructure evolve how devices and users interact with enterprise networks, network security is evolving too. For more information, see Zero Trust Architecture.
These days, zero trust is the big buzz in cybersecurity, discussed in cybersecurity conferences and presidential press rooms alike. Zero trust is frequently interpreted as incorporating high-friction tactics like continuous re-authentication prompts and automated logouts that add obstacles, time, and frustration to the user experience. But leveraging zero trust principles doesn’t have to mean consigning users to a world where we spend as much time trying to access digital resources as using them.
In this post, we clear up the confusion on zero trust and discuss how a thoughtful cybersecurity team can structure a zero-trust system that keeps users and data safe, and maintain a seamless user experience.
What is zero trust?
Before you evaluate how you can best leverage zero trust principles, take a step back to define it. Zero trust is a network security framework of continuous verification, moving “defenses from static, network-based perimeters to focus on users, assets, and resources”, according to the Zero Trust Architecture paper.
Instead of letting users access the entire network when their devices are authenticated, like trust but verify or trusting a device that makes it through a firewall, like perimeter security, zero trust security tactics take the approach of never trust, always verify by tracking users and data continuously as they navigate the network.
Technologies like multi-factor authentication (MFA) are implemented to limit access and authorization, while cryptography techniques encrypt data before and while it traverses the network. Indeed, those tactics were specifically mentioned in the Presidential Executive Order on zero trust.
While these are protective actions, these tactics have significant downsides to consider.
Continuous verification with MFA, constant re-login prompts, and frequent time-outs
These tactics have an adverse effect on the enterprise user experience. Authentication slows users down from their work and forces them to have devices constantly available. These frictions multiply for single users when they leverage multiple devices (phone, laptop, or tablet), which is increasingly common in the workplace today.
Most worryingly, all these efforts can lead to “authentication fatigue,” where users are asked to authenticate so much that they no longer pay attention to the notification. This is itself a significant security gap that increases the likelihood of a breach.
Encrypting everything, always
This tactic runs the risk of over-reliance on a useful layer of security to the point of obsolescence. Already, advances in computing technology have the potential to break or severely limit encryption as we know it.
In addition, when you consider that encryption is only as secure as its keys, the ability of world legislatures to mandate back doors into end-to-end encrypted systems presents an increased likelihood of breaking the encryption and opening up attack avenues. This could leave organizations almost as vulnerable as they were before encryption.
To realize the true potential of zero trust, a more holistic, expansive, and sustainable interpretation of the principles are required.
Comprehensive zero trust
At its core, an effective zero trust strategy enables a positive user experience while ensuring a high level of security. Using analytics and automation technologies that monitor and act on suspicious behavior in the network can help reduce friction.
The following components are key to enabling a comprehensive security architecture based on zero trust principles
To ensure a strong authentication function, the network should be continuously monitored with automated data collection of user behavior. This data forms a real-time base for information that can be analyzed and acted upon, replacing repeated identity verification requests with actionable information.
To establish access protocols, network architects should build in User Behavioral Analytics (UBA) that can use multiple variables for context clues based on the data and learn with AI to make better and faster judgements on suspicious activity. This helps to avoid cumbersome rules in system design, and positions authentication requests as targeted access tools instead of a default.
The promise of UBA can be realized by distributing compute through the environment, leveraging logging devices, NICs, compute nodes, and storage nodes to accelerate the analytical function. For more information, see NVIDIA Morpheus Cybersecurity.
To protect data in case of a breach, systems should be architected to place defense throughout the fabric of the data center, rather than focusing on the perimeter. Network architectures often focus on preventing malicious actors from leaving the network, but that is an inverse of “perimeter security.” It’s just as important to limit lateral movement inside the network.
Encryption can help, but larger architecture network adjustments, as well as instrumentation changes, and additions should be incorporated as the primary strategy. This approach will result in orders of magnitude more data to collect, analyze and include in automated security systems.
These tactics are designed to scale and evolve as the needs of enterprises do. The prospect of scaled data collection, analysis, and action with current infrastructure may sound daunting. To support the effort, the NVIDIA zero-trust cybersecurity platform combines three technologies—NVIDIA BlueField DPUs, NVIDIA DOCA, and the NVIDIA Morpheus cybersecurity AI framework—that enable development partners to bring a new level of security to data centers.
Summary
The NVIDIA zero trust platform brings the power of accelerated computing and deep learning to continuously monitor and detect threats, and isolates applications from infrastructure to limit lateral breaches, at speeds up to 600x faster than servers without NVIDIA acceleration. With this infrastructure, strong data management and AI techniques, the promise of zero trust can be realized in the next generation of cybersecurity.
Machine learning (ML) employs algorithms and statistical models that enable computer systems to find patterns in massive amounts of data. They can then use a model that recognizes those patterns to make predictions or descriptions on new data.
Today, ML is used in virtually every industry, including retail, healthcare, transportation, and finance to improve customer satisfaction, boost productivity, and improve operational efficiencies. However, getting access to environments, which enables you to try out new tools and technologies, is often tricky at best, and prohibitive at worst.
In this post, I walk through each step to build an end-to-end ML service, starting from data processing to model training to inference, using RAPIDS. With the new one-click deploy feature of the NGC catalog, you can access the notebook and try out the ML pipeline, without having to spin up infrastructure and install packages yourself.
Accelerating application development with AI software and infrastructure
If you’re already building data science applications, you’re 90% of the way to using RAPIDS.
RAPIDS: Accelerating machine learning
RAPIDS is a suite of open-source software libraries that allows you to develop and execute end-to-end data science and analytics pipelines, entirely on the GPU. The RAPIDS Python API looks and feels like the data science tools that you already use, like pandas andscikit-learn, so you can reap the benefits with only minimal changes to your code.
RAPIDS eliminates bottlenecks in modern data science workflows by bringing data onto the GPU during ingestion directly and keeping it there for exploration, feature engineering, and model training. This allows you to iterate quickly through the early stages of the ML workflow, and try out more advanced techniques in fixed time on the GPU.
RAPIDS also integrates with other well-known frameworks, including XGBoost, which provides an API for carrying out training and inference with gradient boosted decision trees.
NGC catalog: A hub for GPU-optimized software
The NVIDIA NGC catalog provides GPU-optimized AI andML frameworks, SDKs, and pretrained models. It also hosts example Jupyter Notebooks for a variety of applications including the example that I cover in this post. Now, the notebook can be easily deployed with a single click on Vertex AI Workbench.
Google Cloud Vertex AI: A GPU-accelerated cloud platform
Google Cloud Vertex AI Workbench is a single development environment for the entire data science workflow. It accelerates data engineering by deeply integrating with all the services necessary to rapidly build and deploy models in production.
NVIDIA and Google Cloud have partnered to enable this one-click feature that launches the JupyterLab instance on Vertex AI with an optimal configuration, pre-loads the software dependencies, and downloads the NGC notebook in one go. This allows you to start executing the code right away without needing any expertise to configure the development environment.
If you don’t have a Google Cloud account, sign up to receive free credits, which are sufficient to build and run this application.
Get building
Here’s every step you need to take to start your journey with GPU-accelerated data science.
Accessing the environment
Before you get started, make sure that the following prerequisites are met:
You have registered for an NGC account, and signed in.
After you sign into NGC, you are presented with the curated content.
Figure 1. NGC Catalog home page
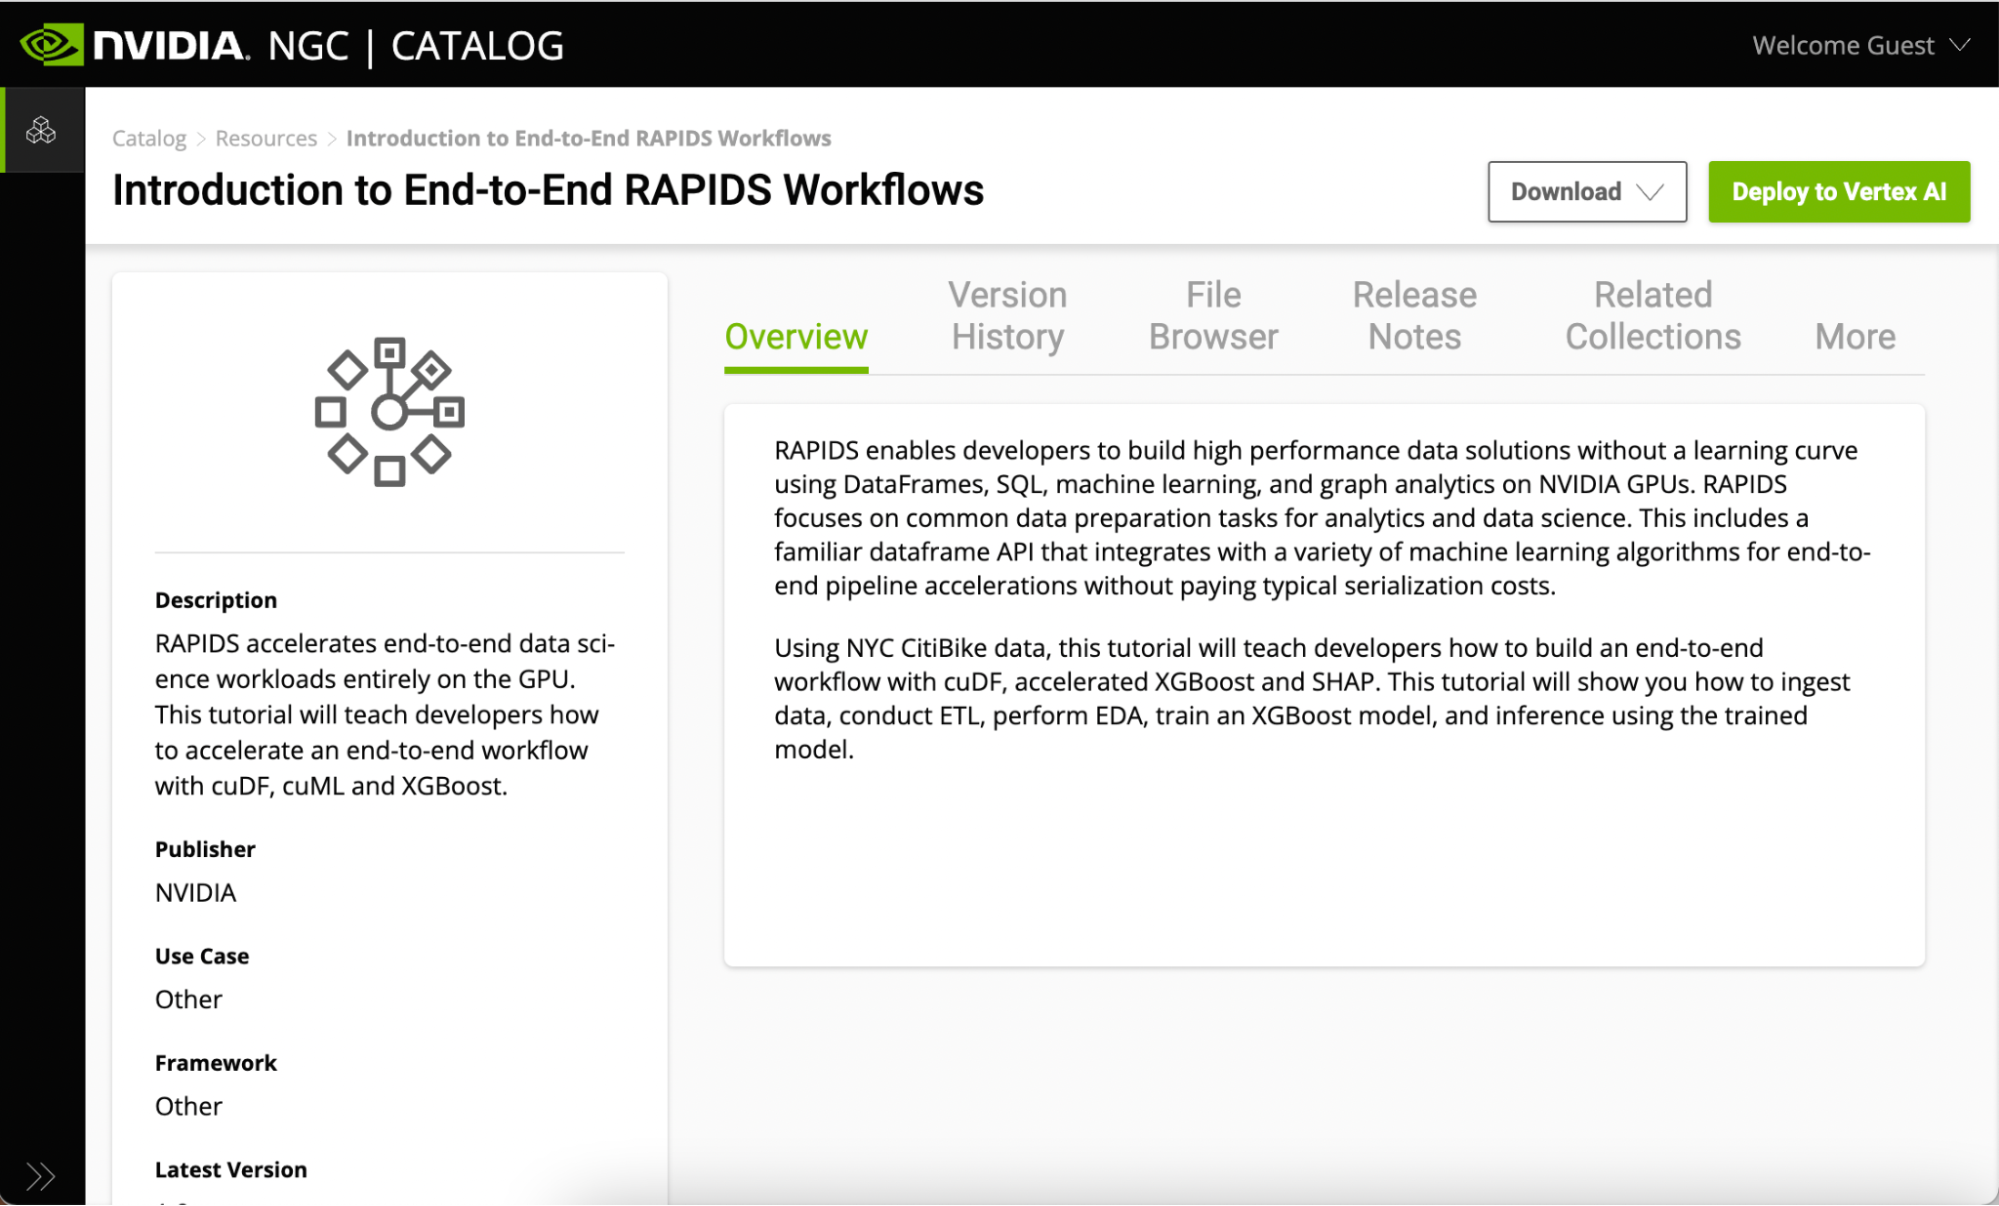
All Jupyter Notebooks on NGC are hosted under the Resources tab. Look at the Introduction to End-to-End RAPIDS Workflows. This page contains information on the RAPIDS libraries, as well as an overview of what is covered in the notebook.
Figure 2. Introduction to End-to-End Workflows with RAPIDS
There are a couple of ways to get started using the sample Jupyter Notebooks from this resource:
Download the resource
One-click deploy to Vertex AI.
If you already have your own local or cloud environment with a GPU enabled, you could download the resource and run it on your own infrastructure. However, for this post, use the one-click deploy functionality to run the notebook on Vertex AI, without the need to install your own infrastructure manually.
The one-click deploy feature fetches the Jupyter Notebook, configures the GPU instance, installs dependencies, and provides running a JupyterLab interface to get started.
Setting up the managed notebook
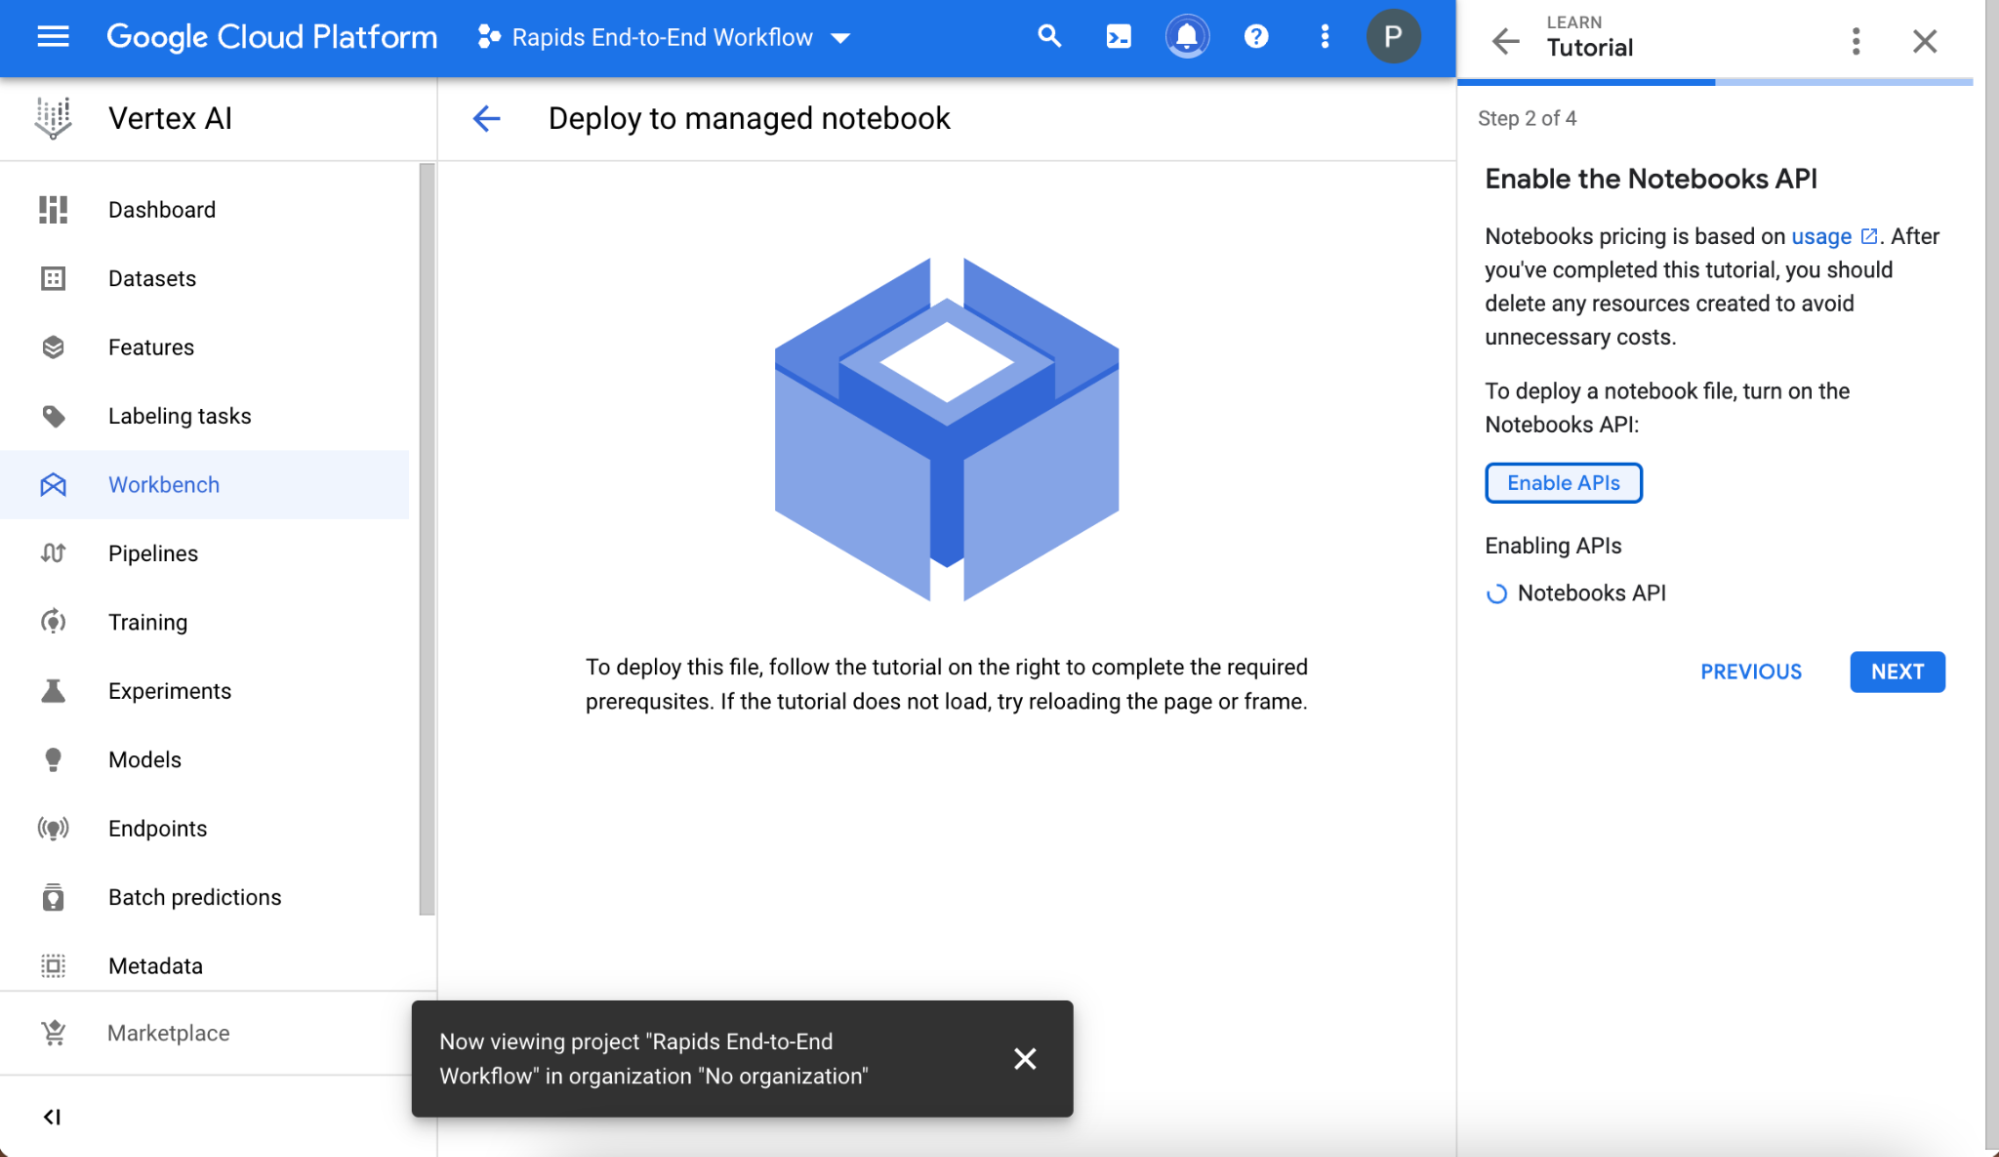
Follow the brief tutorial to make sure that your environment is set up correctly.
Figure 3. The initial deployment page of Vertex AI
Create and name your project, and choose it in the Select a project field after the project is created. Write down the project ID value displayed automatically below the project name, as you need it later.
Next, enable the Notebooks API.
Setting up the hardware
Before you choose Create to deploy the notebook, choose Advanced settings. The following information is preconfigured but customizable, depending on the requirements of the resource:
Name of the notebook
Region
Docker container environment
Machine type, GPU type, Number of GPUs
Disk type and data size
Before you deploy:
Review to ensure that there are GPUs available in the region that have been preconfigured. If GPUs are unavailable, you see a warning and you should change your region:
Make sure that the Install GPU driver for me automatically button is checked.
Now that everything looks good and you have your GPU and driver, choose Create at the bottom of the page. Creating the GPU compute instance and setting up the JupyterLab environment takes about a couple of minutes.
Starting Jupyter
Start the interface by choosing Open -> Open JupyterLab. The JupyterLab interface pulls the resources (custom container and Jupyter Notebooks) from NGC. The kernel may take a while to pull, so be patient!
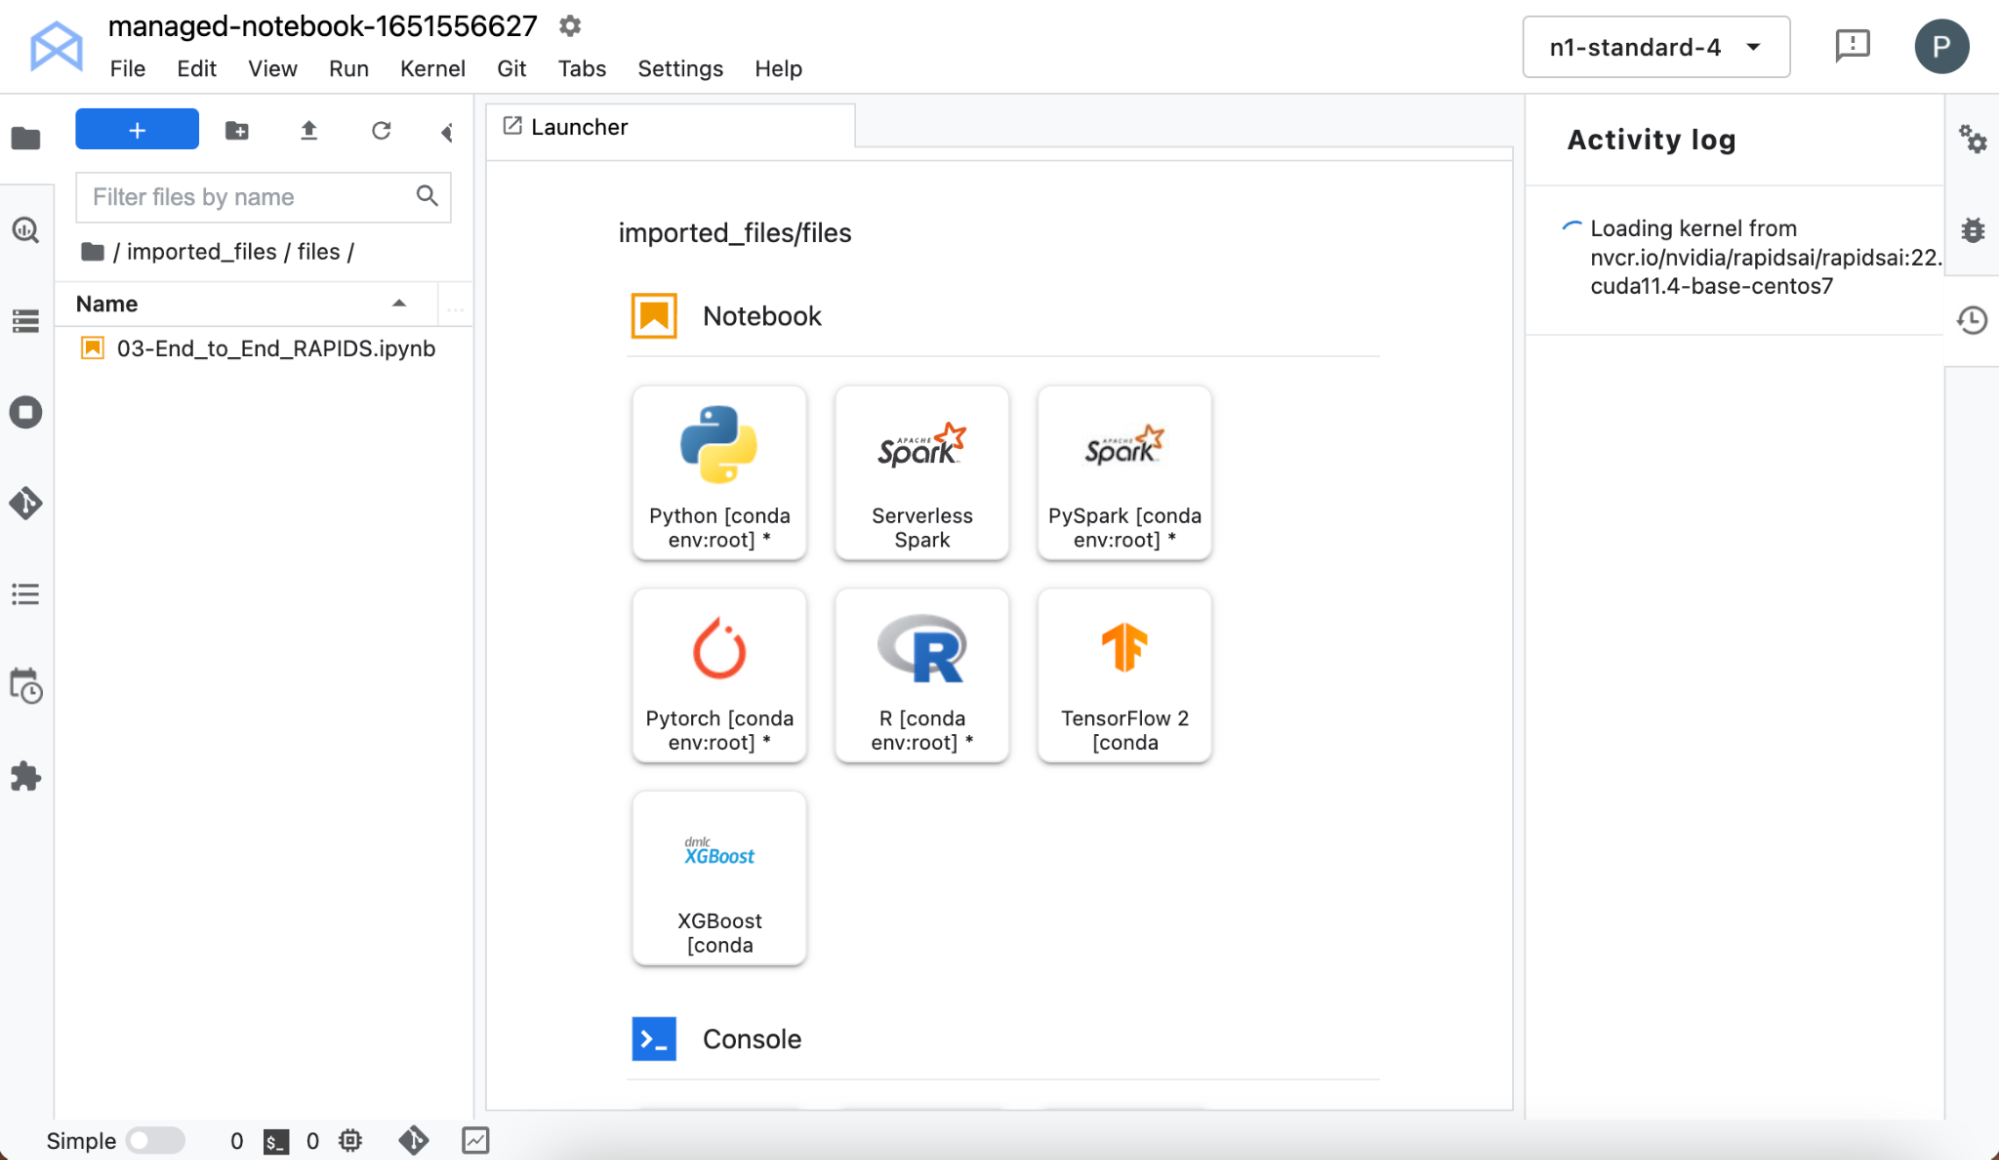
When it’s loaded, you can select the RAPIDS kernel from the kernel selector. After the kernel has finished loading, in the left pane, double-click the notebook name.
Figure 4. The JupyterLab landing page
Without setting up your own infrastructure, you’ve now got access to a notebook environment with RAPIDS libraries preinstalled, so you can go ahead and try it out for yourself.
Working with the workflow
The project uses data from the CitiBike bike share program in New York City. More details are available in the notebook itself.
Before you dive into data processing, you can look at the details about the GPU using the NVIDIA SMI command. This shows you what you expected: VertexAI has allocated a V100 T4 GPU, with 16 GB of memory.
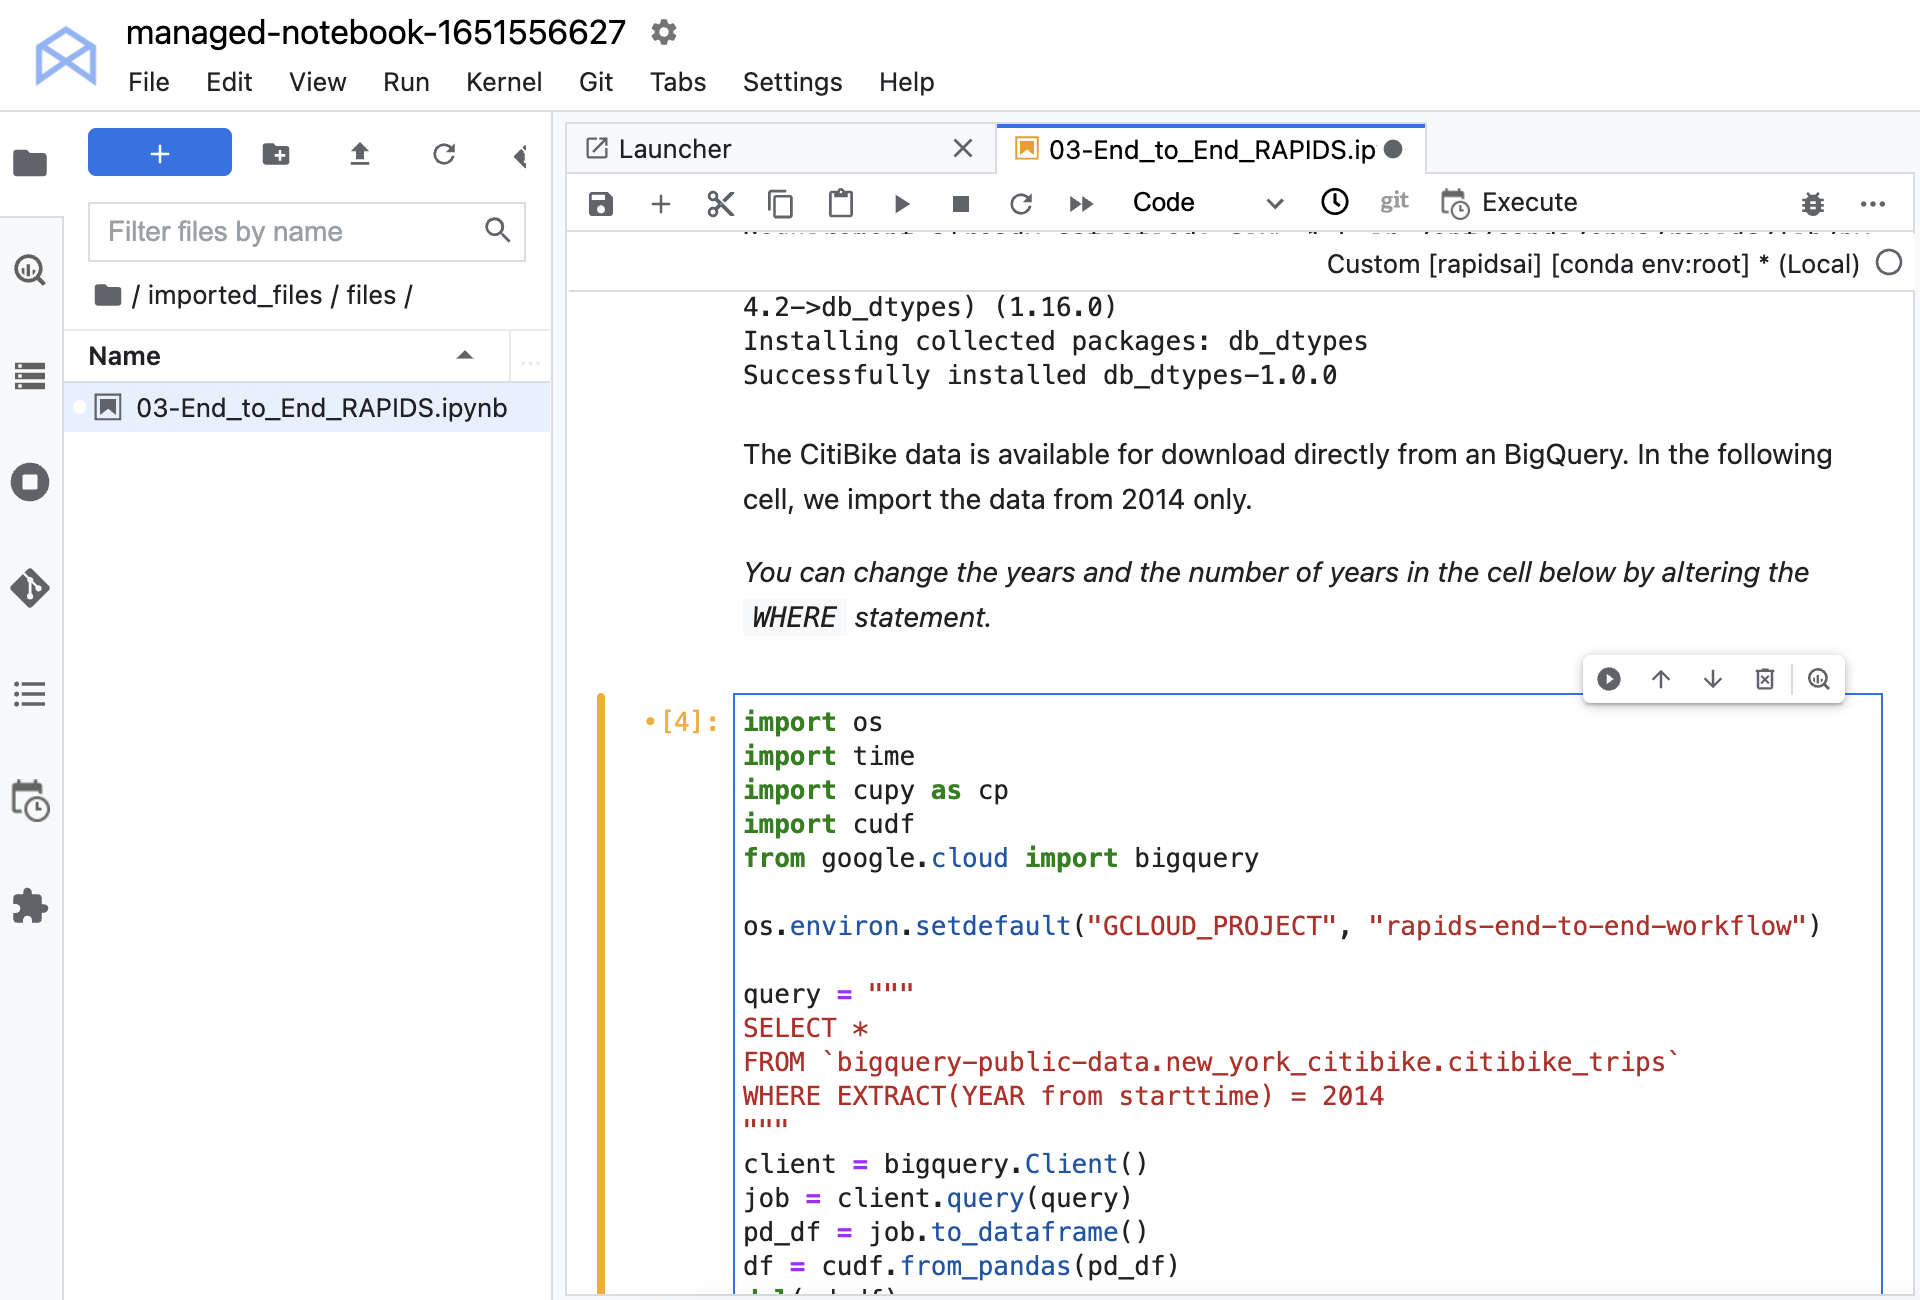
You must install a couple of libraries, which enable you to load your data from Google BigQuery. This data set is publicly available on BigQuery, so you don’t need any credentials to load it. Load the data from a large query, using the Python API.
Convert the data into a cuDF data frame. cuDF is the RAPIDS GPU DataFrame library, which provides everything you need to efficiently transform, load, and aggregate data on the GPU. The cuDF data frame is stored on the GPU, and that is where the data remains for the rest of the work. This helps provide massive speedups by leveraging the speed of GPUs and cutting down on costly transfers back and forth from CPU to GPU.
Before you can run the notebook, uncomment the command os.environ.setdefault and put the ID of your project into the second argument. If you don’t remember the ID assigned to your project when you set it up, it’s shown on the Workbench main page after you select a project. Remember to use the ID and not the name.
Figure 5. Give the project ID to the environment
Now, the data is loaded. You can inspect it and look at data types and summaries of the features. Each entry contains a start time, stop time, station ID denoting where the bike was collected, and station ID denoting where the bike was dropped off. There’s also other information about the bike, pick up and drop off location, and the user’s demographics.
Data processing
In the next cells, you process the data to create feature vectors, which capture the important information to use to train the ML model.
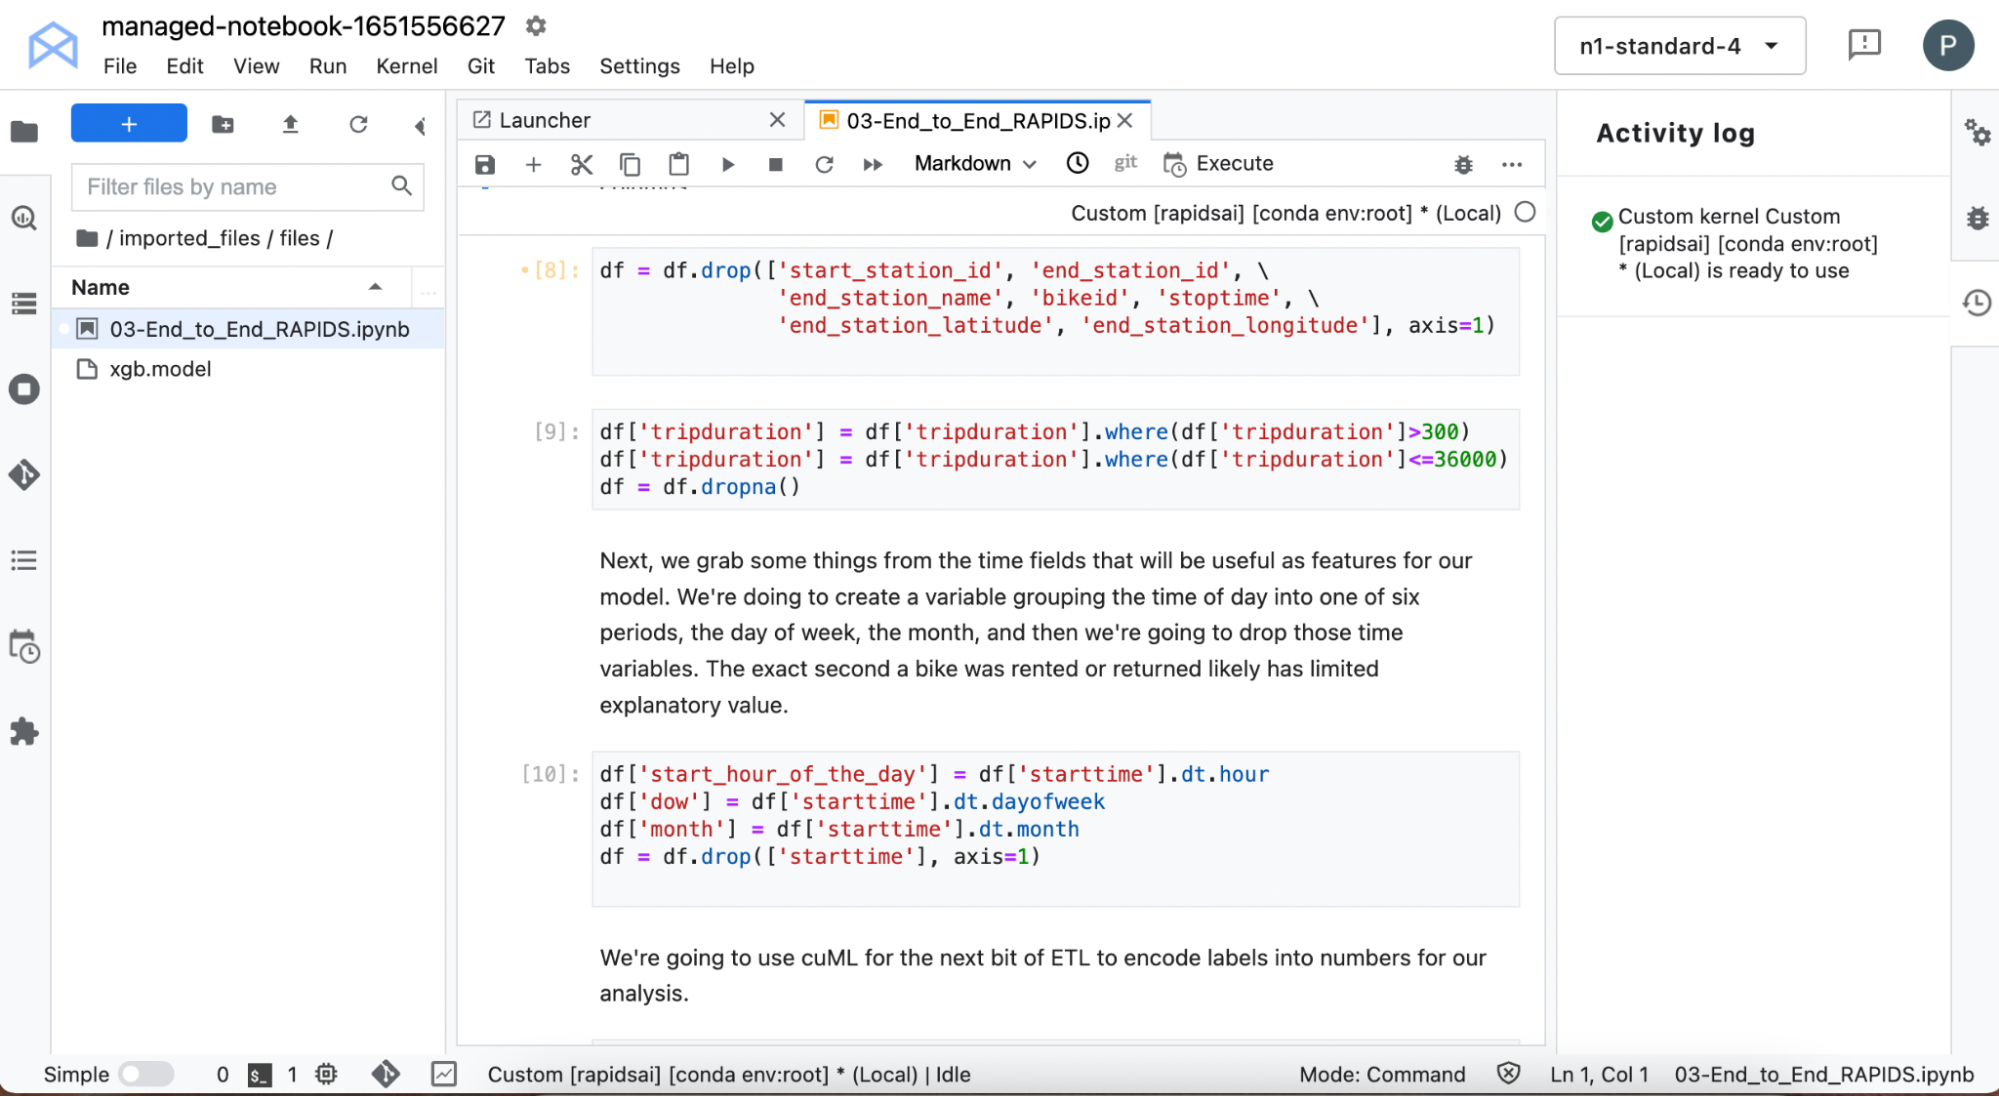
Process the start time to extract information such as the day of the week that the bike was hired, as well as the hour of the day. You remove all features from the data, which contain information about the end of the ride, as the goal is to predict the ride duration at the point of pick-up.
You also filter out extremely short rides for faulty bikes immediately returned and extremely long rides lasting more than 10 hours. The city bikes are supposed to be used for relatively short trips around the city and are not suitable for long journeys, so you don’t want this data to skew the model.
Use some of the cuDF built-in time functionality to capture specifics about when the bikes were checked-out. Do some other data processing, like using cuML to automatically create label encoding for certain text variables.
Figure 6. Data processing with RAPIDS
Model training
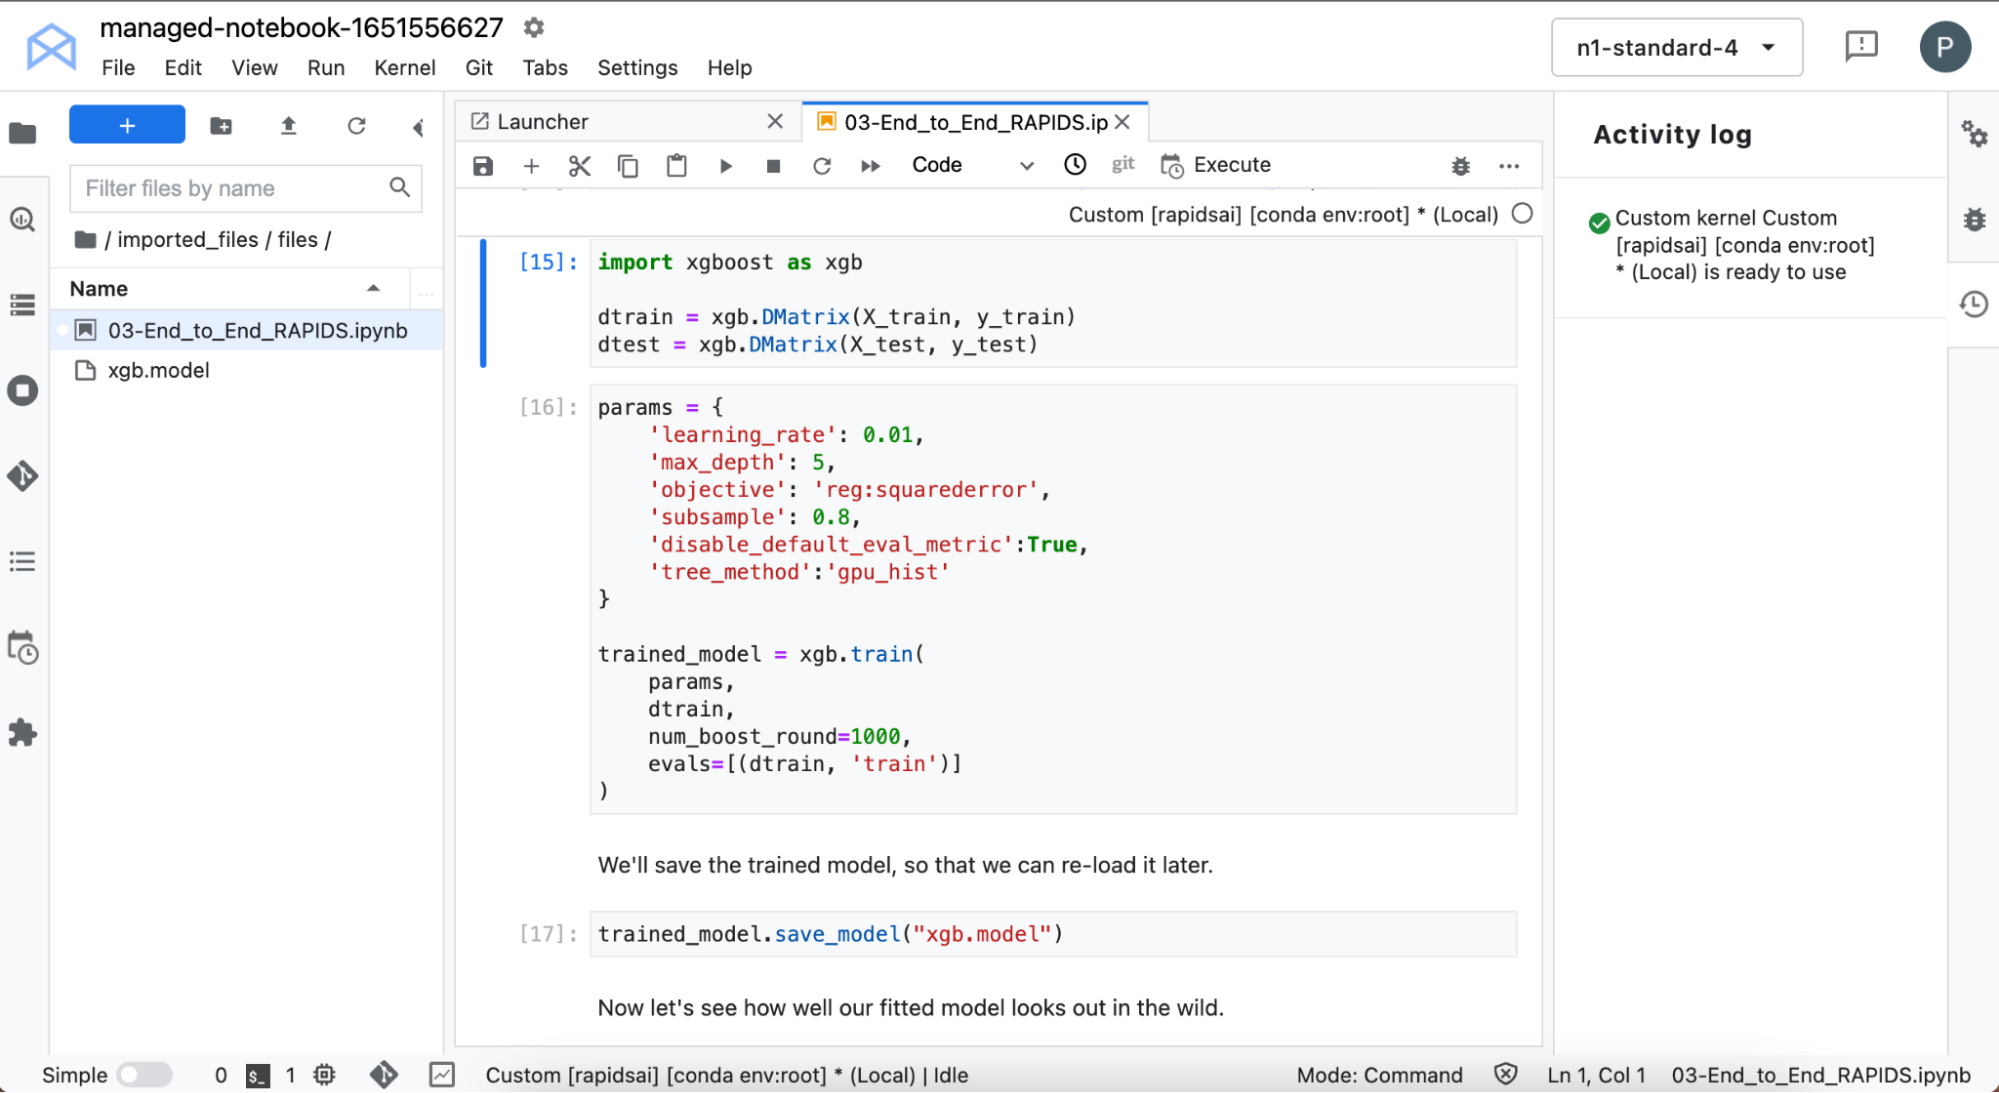
You then train an XGBoost model. XGBoost provides an API for carrying out training and inference with gradient-boosted decision trees.
Figure 7. Model training with XGBoost
This is training on the GPU: super fast. It accepts your data directly from cuDF with no need to change the format.
Now that you’ve trained the model, use it to predict ride time on some data that it wasn’t trained on, and compare that to the group truth. Without tuning any hyperparameters, the model is doing a reasonable job at predicting ride time. There are improvements that could be made, but for now look at which features are influencing the model’s predictions.
Model explanation
When using complex models, such as XGBoost, it’s not always straightforward to understand the predictions made by the model. In this section, you use SHapley Additive exPlanation (SHAP) values to gain insight into the ML model.
Computing SHAP values is a computationally expensive procedure, but you can accelerate the procedure by running on NVIDIA GPUs. To save more time, compute SHAP values on a subset of the data.
Next, look at the influence of individual features, as well as combinations of features.
Accelerating inference
Training the model is often seen as the computationally expensive part of the workflow, so GPUs come into their own here. In practice, that’s true. But GPUs can also dramatically accelerate the time it takes to make a prediction for some models.
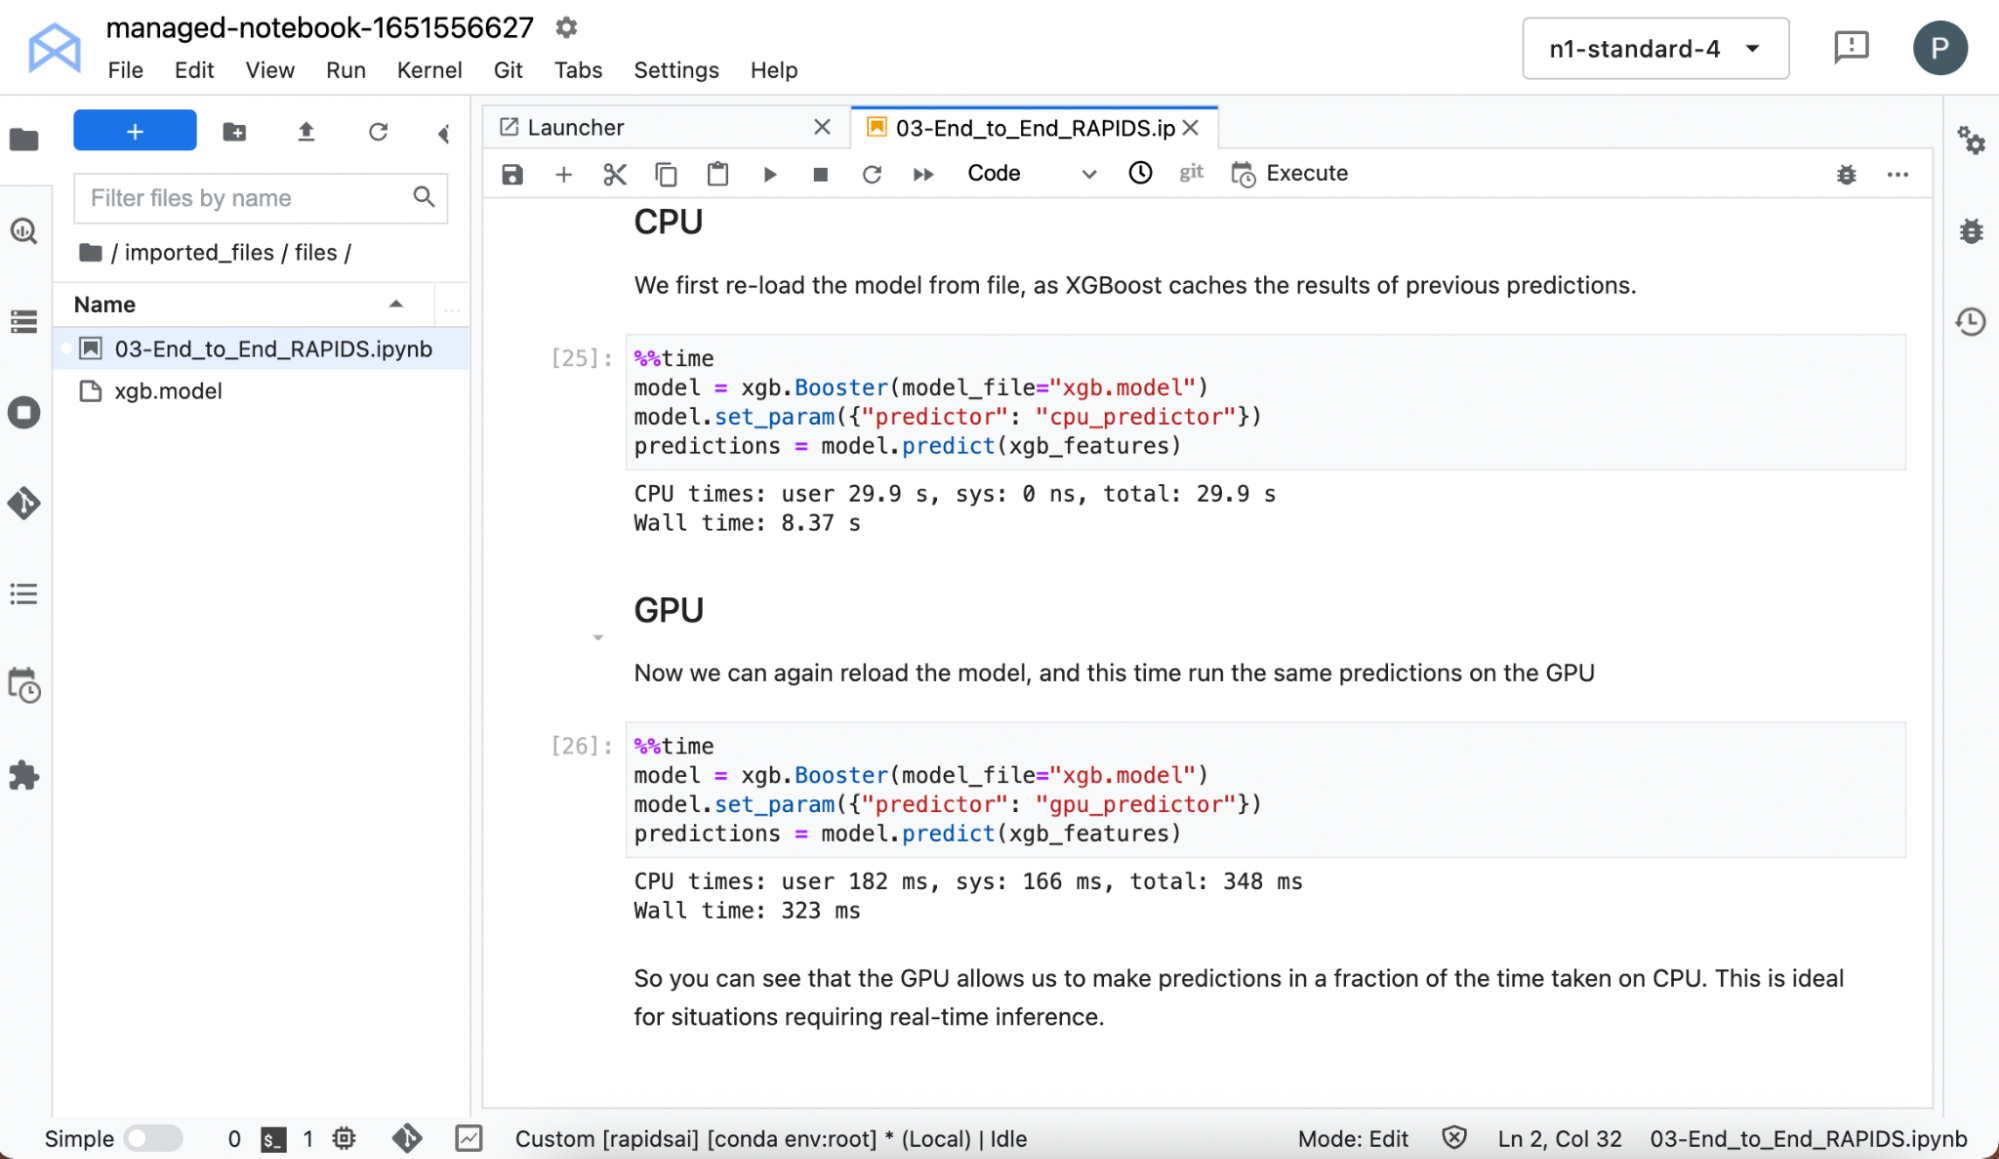
Reload the model because XGBoost caches previous predictions and time it when making predictions on both CPU and GPU.
Figure 8. Prediction speed comparison for fitted model between CPU and GPU
Even on this small data set and simple model, you can see the massive speedups in inference when running on the GPU.
Conclusion
RAPIDS enables you to carry out end-to-end workflows on the GPU, giving you the power to consider more complex techniques and gain quicker insight into the data.
With the NGC catalog’s one-click deploy feature, you can get access to an environment with RAPIDS in a matter of minutes and develop your ML pipelines without having to spin up your own infrastructures or install the libraries yourself.
It’s easy to get started! Follow these steps and you’ll be on your way to speeding up all your data science work without any of the hassles of setting up infrastructure.
To learn more about RAPIDS and reach out to the RAPIDS team on Twitter. And of course, search through the NGC catalog to get more easy-to-deploy models and examples.
Real-time rendering is helping one studio take virtual production to impossible heights. In their latest project, the creators at Los Angeles-based company Impossible Objects were tasked with depicting an epic battle between characters from the upcoming video game, Diablo Immortal. But the showdown had to take place on the surface of a Google Pixel phone, Read article >
Eyal Ben-Ari just took his first shot on a goal of bringing professional-class analytics to amateur soccer players. The CEO of startup Track160, in Tel Aviv, has seen his company’s AI-powered sports analytics software tested and used in the big leagues. Now he’s turning his attention to underserved amateurs in the clubs and community teams Read article >


 Doing zero trust well requires enterprises to monitor and analyze massive amounts of data, supported by artificial intelligence and accelerated computing.
 Here’s how you can quickly get up-and-running using RAPIDS machine learning pipeline with the NVIDIA NGC catalog and Google Vertex AI.
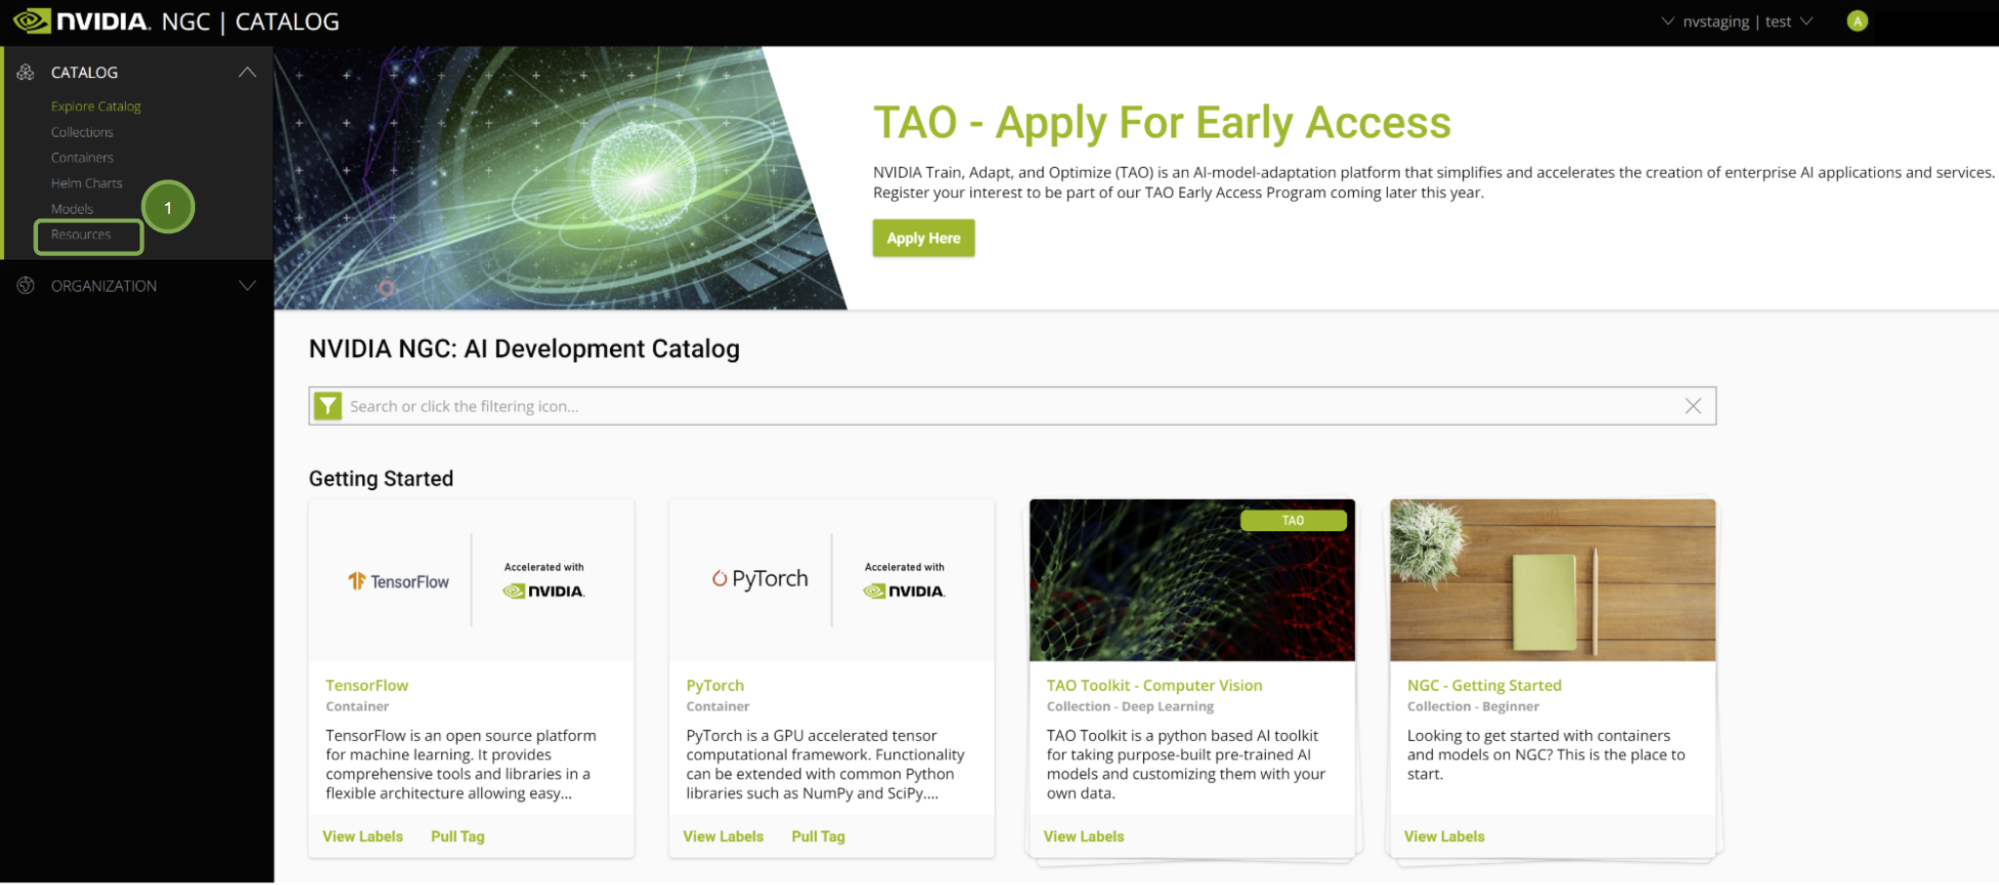