 Try Fleet Command for free on NVIDIA LaunchPad.
With the growth of AI applications being deployed at the edge, IT organizations are looking at the best way to deploy and manage their edge computing systems and software.
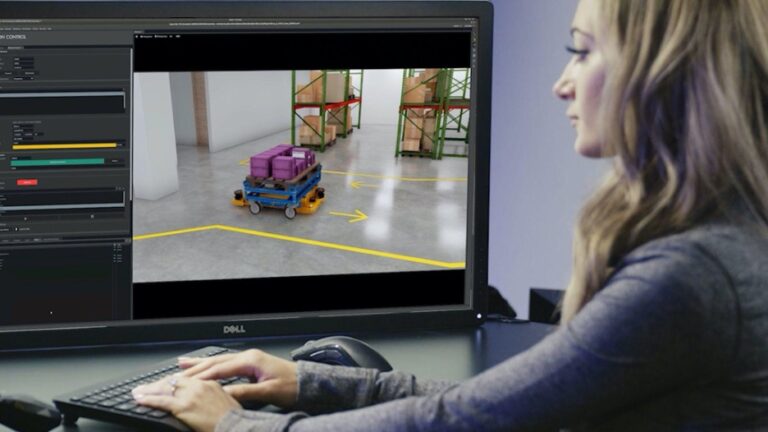
NVIDIA Fleet Command brings secure edge AI to enterprises of any size by transforming NVIDIA-Certified Systems into secure edge appliances and connecting them to the cloud in minutes. In the cloud, you can deploy and manage applications from the NGC Catalog or your NGC private registry, update system software over the air, and manage systems remotely with nothing but a browser and internet connection.
To help organizations test the benefits of Fleet Command, you can test the product using NVIDIA LaunchPad. Through curated labs, LaunchPad gives you access to dedicated hardware and Fleet Command software so you can walk through the entire process of deploying and managing an AI application at the edge.
In this post, I walk you through the Fleet Command trial on LaunchPad including details about who should apply, how long it takes to complete the curated lab experience, and next steps.
Who should try Fleet Command?
Fleet Command is designed for IT and OT professionals who are responsible for managing AI applications at multiple edge locations. The simplicity of the product allows it to be used by professionals of any skill level with ease.
The curated lab walks through the deployment of a demo application. For those with an imminent edge project, the demo application can be used to test the features of Fleet Command but full testing onsite is still necessary.
The Fleet Command lab experience is designed for deployment and management of AI applications at the edge. NVIDIA LaunchPad offers other labs for management of training environments with NVIDIA Base Command, and NVIDIA AI Enterprise for streamlined development and deployment of AI from the enterprise data center.
What does the Fleet Command curated lab include?
In this trial, you act as a Fleet Command administrator deploying a computer vision application for counting cars at an intersection. The whole trial should take about an hour.
Access Fleet Command in NGC
Fleet Command can be accessed from anywhere through NGC, the GPU-optimized software hub for AI, allowing administrators to remotely manage edge locations, systems, and applications.
Administrators automatically have Fleet Command added to the NGC console.
Create an edge location
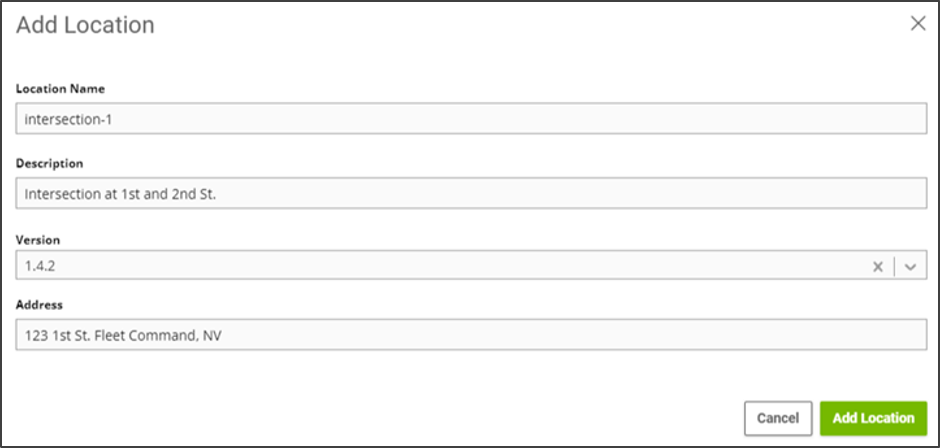
A location in Fleet Command represents a real-world location where physical systems are installed. In the lab, you create one edge location, but customers can manage thousands of locations in production.
To add a new location, choose Add Location and fill in the details. Choose the latest version available.

Add an edge system
Next, add a system to the location, which represents the physical system at the edge. Completing this step generates a code that you can use to securely provision the server onsite with the Fleet Command operating stack. You then select the location just created and choose Add System.

Add the system name and description to complete the process.
After a system is added to a location, you get a generated activation code that is used to pair Fleet Command to the physical system onsite.

Connect Fleet Command to the LaunchPad server
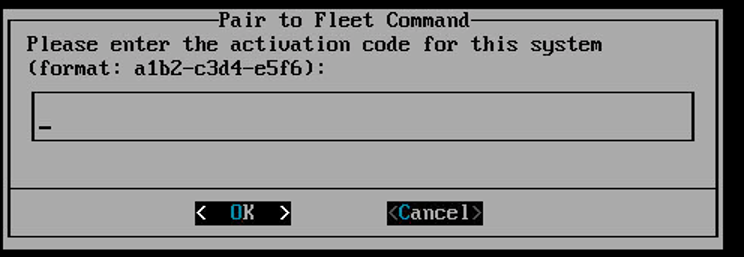
NVIDIA LaunchPad provides a system console to access the server associated with the trial. Follow the prompts to complete installation. After initial setup, the system prompts for the activation code generated from creating a system in Fleet Command.

When the activation code is entered, the system finalizes pairing with Fleet Command. A check box in the Fleet Command user interface shows you that the server is running and ready to be remotely managed.

Deploy an AI application
Now that the local installer has the system paired to Fleet Command, you can deploy an AI application. Applications can be hosted on your NGC private registry, or directly on the NGC Catalog.

AI applications are deployed using Helm charts, which are used to define, install, and upgrade Kubernetes applications. Choose Add Application and enter the information in the prompt.
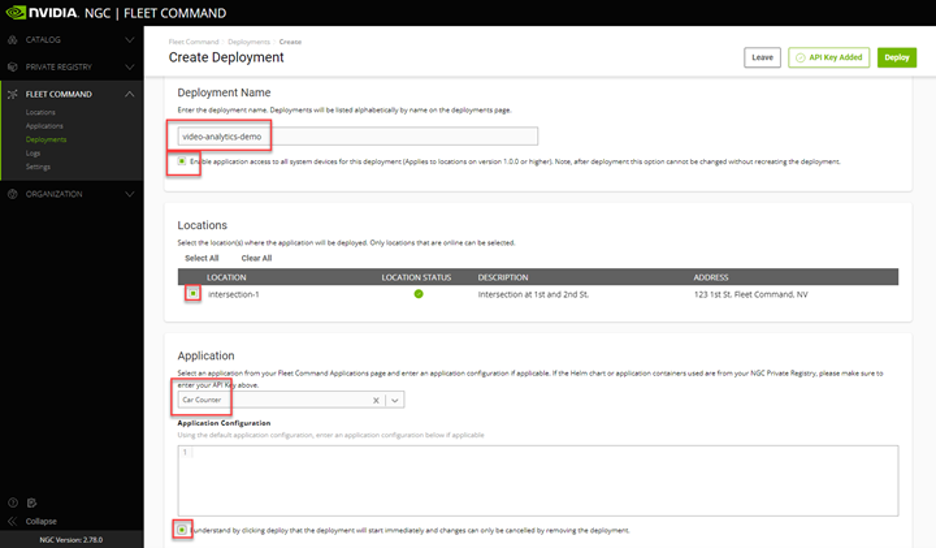
Now that the application is ready in Fleet Command, it can be deployed onto one or many systems. Create a deployment, making sure to check the box enabling application access, by selecting the location and application that you created.

Now the application is deployed on the server and you can view the application running on the sample video data in the trial application.
That’s it. I’ve now walked you through the end-to-end process of connecting to physical systems at the edge, creating a deployment, and pushing an AI application to that edge server. In less than an hour, the trial goes from disconnected, remote systems to fully managed, secure, remote edge environments.
Next steps
Fleet Command is a powerful tool for simplifying management of edge computing infrastructure without compromising on security, flexibility, or scale. To understand if Fleet Command is the right tool for managing your edge AI infrastructure, register for your NVIDIA LaunchPad trial.
