

Learn how to get started with NVIDIA Riva, a fully accelerated speech AI SDK, on AWS EC2 using Jupyter Notebooks and a sample virtual assistant application.
Speech AI can assist human agents in contact centers, power virtual assistants and digital avatars, generate live captioning in video conferencing, and much more. Under the hood, these voice-based technologies orchestrate a network of automatic speech recognition (ASR) and text-to-speech (TTS) pipelines to deliver intelligent, real-time responses.
Building these real-time speech AI applications from scratch is no easy task. From setting up GPU-optimized development environments to deploying speech AI inferences using customized large transformer-based language models in under 300ms, speech AI pipelines require dedicated time, expertise, and investment.
In this post, we walk through how you can simplify the speech AI development process by using NVIDIA Riva to run GPU-optimized applications. With no prior knowledge or experience, you learn how to quickly configure a GPU-optimized development environment and run NVIDIA Riva ASR and TTS examples using Jupyter notebooks. After following along, this virtual assistant demo could be running on your web browser powered by NVIDIA GPUs on Amazon EC2.
Along with the step-by-step guide, we also provide you with resources to help expand your knowledge so you can go on to build and deploy powerful speech AI applications with NVIDIA support.
But first, here is how the Riva SDK works.
How does Riva simplify speech AI?
Riva is a GPU-accelerated SDK for building real-time speech AI applications. It helps you quickly build intelligent speech applications, such as AI virtual assistants.
By using powerful optimizations with NVIDIA TensorRT and NVIDIA Triton, Riva can build and deploy customizable, pretrained, out-of-the-box models that can deliver interactive client responses in less than 300ms, with 7x higher throughput on NVIDIA GPUs compared to CPUs.
The state-of-the-art Riva speech models have been trained for millions of hours on thousands of hours of audio data. When you deploy Riva on your platform, these models are ready for immediate use.
Riva can also be used to develop and deploy speech AI applications on NVIDIA GPUs anywhere: on premises, embedded devices, any public cloud, or the edge.
Here are the steps to follow for getting started with Riva on AWS.
Running Riva ASR and TTS examples to launch a virtual assistant
If AWS is where you develop and deploy workloads, you already have access to all the requirements needed for building speech AI applications. With a broad portfolio of NVIDIA GPU-powered Amazon EC2 instances combined with GPU-optimized software like Riva, you can accelerate every step of the speech AI pipeline.
There are four simple steps to get started with Riva on an NVIDIA GPU-powered Amazon EC2 instance:
- Launch an Amazon EC2 instance with NVIDIA GPU-optimized AMI.
- Pull the Riva container from the NGC catalog.
- Run the Riva ASR and TTS
Hello Worldexamples with Jupyter notebooks. - Launch an intelligent virtual assistant application.
To follow along, make sure that you have an AWS account with access to NVIDIA GPU-powered instances (for example, Amazon EC2 G and P instance types such as P4d instances for NVIDIA A100 GPUs and G4dn instances for NVIDIA T4 GPUs).
Step 1: Launch an EC2 instance with the NVIDIA GPU-optimized AMI
In this post, you use the NVIDIA GPU-optimized AMI available on the AWS Marketplace. It is preconfigured with NVIDIA GPU drivers, CUDA, Docker toolkit, runtime, and other dependencies. It also provides a standardized stack for you to build speech AI applications. This AMI is validated and updated quarterly by NVIDIA with the newest drivers, security patches, and support for the latest GPUs to maximize performance.
Choose an instance type
In the AWS Management Console, launch an instance from the AWS Marketplace, using the NVIDIA GPU-Optimized AMI.
Instance types available may vary by region. For more information about choosing an appropriate instance type for your use case, see Choosing the right GPU for deep learning on AWS.
We recommend using NVIDIA A100 GPUs (P4d instances) for best performance at scale but for this guide, an A10G single-GPU instance (g5.xlarge instances) powered by the NVIDIA Ampere Architecture is fine.
For a greater number of pre- or postprocessing steps, consider larger sizes with the same single GPU, more vCPUs, and higher system memory, or consider the P4d instances that take advantage of 8x NVIDIA A100 GPUs.
Configure the instance
To connect to the EC2 instance securely, create a key pair.
- For Key pair type, select RSA.
- For Private key file format, select ppk for use with PuTTY, depending on how you plan to connect to the instance.
After the key pair is created, a file is downloaded to your local machine. You need this file in future steps for connecting to the EC2 instance.
Network settings enable you to control the traffic into and out of your instance. Select Create Security Group and check the rule Allow SSH traffic from: Anywhere. At any point in the future, this can customized based on individual security preferences.
Finally, configure the storage. For this example, 100 GiB on a general purpose SSD should be plenty.
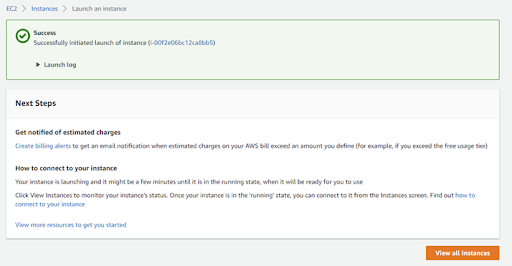
Now you are ready to launch the instance. If successful, your screen should look like Figure 1.
Connect to the instance
After a few minutes under Instances on the sidebar, you will see your running instance with a public IPv4 DNS. Keep this address handy as it is used to connect to the instance using SSH. This address will change every time you start and stop your EC2 instance.
There are a number of ways to connect to your EC2 instance. This post uses the PuTTY SSH client to spin up a session from scratch and create the tunneling system into the instance.
You may begin working with your NVIDIA GPU-powered Amazon EC2 instance.
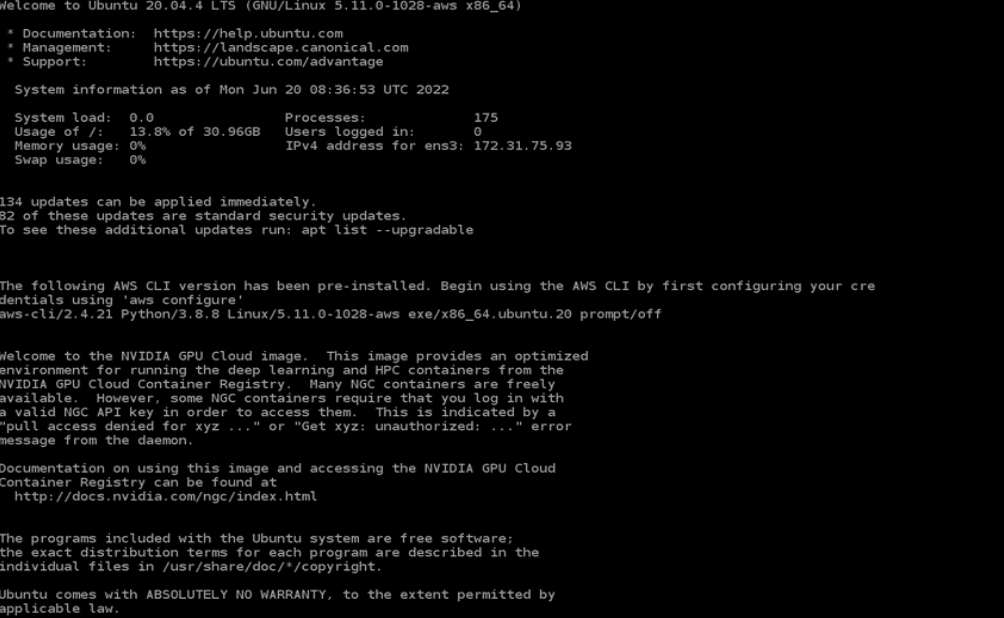
Log in with username ubuntu, and make sure that you have the right NVIDIA GPUs running:
nvidia-smi
Step 2: Pull the Riva container from the NGC catalog
To access Riva from your terminal, first create a free NGC account. The NGC catalog is a one-stop-shop for all GPU optimized software, containers, pretrained AI models, SDKs, Helm charts and other helpful AI tools. By signing up, you get access to the complete NVIDIA suite of monthly updated GPU optimized frameworks and training tools so that you can build your AI application in no time.
After you create an account, generate an NGC API key. Keep your generated API key handy.
Now you can configure the NGC CLI (preinstalled with the NVIDIA GPU-Optimized AMI), by executing the following command:
ngc config setEnter your NGC API Key from earlier, make sure that the CLI output is ASCII or JSON, and follow the instructions using the Choices section of the command line.
After configuration, on the Riva Skills Quick Start page, copy the download command by choosing Download at the top right side. Run the command in your PuTTY terminal. This initiates the Riva Quick Start resource to download onto your EC2 Linux instance.
Initialize Riva
After the download is completed, you are ready to initialize and start Riva.
The default settings will prepare all of the underlying pretrained models during the Riva start-up process, which can take up to a couple of hours depending on your Internet speed. However, you can modify the config.sh file within the /quickstart directory with your preferred configuration around which subset of models to retrieve from NGC to speed up this process.
Within this file, you can also adjust storage location and specify which GPU to use, if more than one is installed on your system. This post uses the default configuration settings. The version (vX.Y.Z) number of Riva Quick Start that you downloaded is used to run the following commands (v2.3.0 is the version number used in this post).
cd riva_quickstart_v2.3.0
bash riva_init.sh
bash riva_start.sh
Riva is now running on your virtual machine. To familiarize yourself with Riva, run the Hello World examples next.
Step 3: Run the Riva ASR and TTS Hello World examples
There are plenty of tutorials available in the /nvidia-riva GitHub repo. The TTS and ASR Python basics notebooks explore how you can use the Riva API.
Before getting started, you must clone the GitHub repo, set up your Python virtual environment, and install Jupyter on your machine by running the following commands in the /riva_quickstart_v2.3.0 directory:
git clone https://github.com/nvidia-riva/tutorials.git
Install and create a Python virtual environment named venv-riva-tutorials.
sudo apt install python3-venv
python3 -m venv venv-riva-tutorials
.venv-riva-tutorials/bin/activate
When the virtual environment has been activated, install the Riva API and Jupyter. Create an IPython kernel in the /riva_quickstart_v2.3.0 directory.
pip3 install riva_api-2.3.0-py3-none-any.whl
pip3 install nvidia-riva-client
pip3 install jupyter
ipython kernel install --user --name=venv-riva-tutorials
To run some simple Hello World examples, open the /tutorials directory and launch the Jupyter notebook with the following commands:
cd tutorials
jupyter notebook --generate-config
jupyter notebook --ip=0.0.0.0 --allow-root
The GPU-powered Jupyter notebook is now running and is accessible through the web. Copy and paste one of the URLs shown on your terminal to start interacting with the GitHub tutorials.
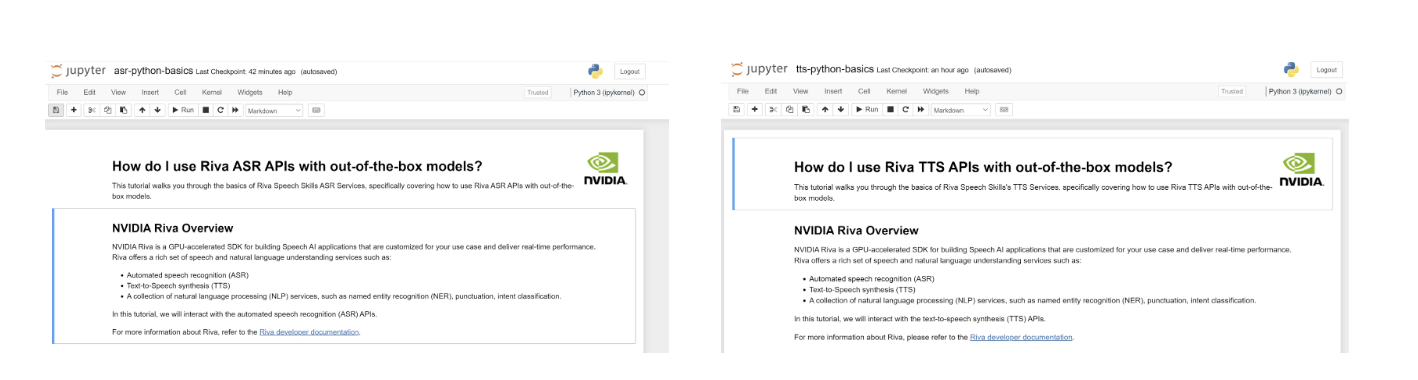
Open the tts-python-basics.ipynb and asr-python-basics.ipynb scripts on your browser and trust the notebook by selecting Not-Trusted at the top-right of your screen. To choose the venv-riva-tutorials kernel, choose Kernel, Change kernel.
You are now ready to work through the notebook to run your first Hello World Riva API calls using out-of-the-box models (Figure 3).
Explore the other notebooks to take advantage of the more advanced Riva customization features, such as word boosting, updating vocabulary, TAO fine-tuning, and more. You can exit Jupyter by pressing Ctrl+C while on the PuTTY terminal, and exit the virtual environment with the deactivate command.
Step 4: Launch an intelligent virtual assistant
Now that you are familiar with how Riva operates, you can explore how it can be applied with an intelligent virtual assistant found in /nvidia-riva/sample-apps GitHub repo.
To launch this application on your browser, run the following command in the /riva_quickstart_v2.3.0 directory:
git clone https://github.com/nvidia-riva/sample-apps.git
Create a Python virtual environment, and install the necessary dependencies:
python3 -m venv apps-env
. apps-env/bin/activate
pip3 install riva_api-2.3.0-py3-none-any.whl
pip3 install nvidia-riva-client
cd sample-apps/virtual-assistant
pip3 install -U pip
pip3 install -r requirements.txt
Before you run the demo, you must update the config.py file in the Virtual Assistant directory. Vim is one text editor that you can use to modify the file:
vim config.py
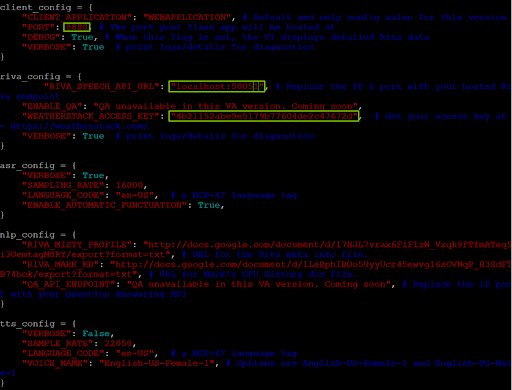
Make sure that the PORT variable in client_config is set to 8888 and the RIVA_SPEECH_API_URL value is set to localhost:50051.
To allow the virtual assistant to access real-time weather data, sign up for the free tier of weatherstack, obtain your API access key, and insert the key value under WEATHERSTACK ACCESS KEY in riva_config.
Now you are ready to deploy the application!
Deploy the assistant
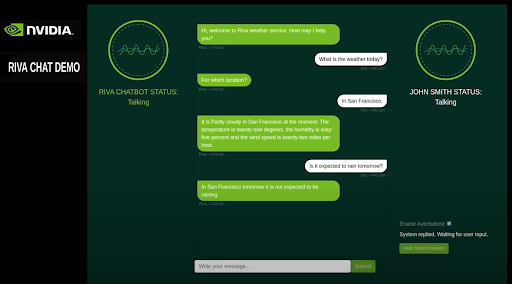
Run python3 main.py and go to the following URL: https://localhost:8888/rivaWeather. This webpage opens the weather chatbot.
Congratulations!
You’ve launched an NVIDIA GPU-powered Amazon EC2 instance with the NVIDIA GPU-Optimized AMI, downloaded Riva from NGC, executed basic Riva API commands for ASR and TTS services, and launched an intelligent virtual assistant!
You can stop Riva at any time by executing the following command in the riva_quickstart_v2.3.0 directory:
bash riva_stop.sh.
Resources for exploring speech AI tools
You have access to several resources designed to help you learn how to build and deploy speech AI applications:
- The /nvidia-riva/tutorials GitHub repo contains beginner to advanced scripts to walk you through ASR and TTS augmentations such as ASR word boosting and adjusting TTS pitch, rate, and pronunciation settings.
- To build and customize your speech AI pipeline, you can use the NVIDIA low-code AI model development TAO toolkit and the NeMo application framework for those who like more visibility under the hood for fine-tuning the fully customizable Riva ASR and TTS pipelines.
- Finally, to deploy speech AI applications at scale, you can deploy Riva on Amazon EKS and set up auto-scaling features with Kubernetes.
Interested in learning about how customers deploy Riva in production? Minerva CQ, an AI platform for agent assist in contact centers, has deployed Riva on AWS alongside their own natural language and intent models to deliver a unique and elevated customer support experience in the electric mobility market.
“Using NVIDIA Riva to process the automatic speech recognition (ASR) on the Minerva CQ platform has been great. Performance benchmarks are superb, and the SDK is easy to use and highly customizable to our needs.” Cosimo Spera, CEO of Minerva CQ
Explore other real-world speech AI use cases in Riva customer stories and see how your company can get started with Riva Enterprise.